A/C compressor fault diagnosis
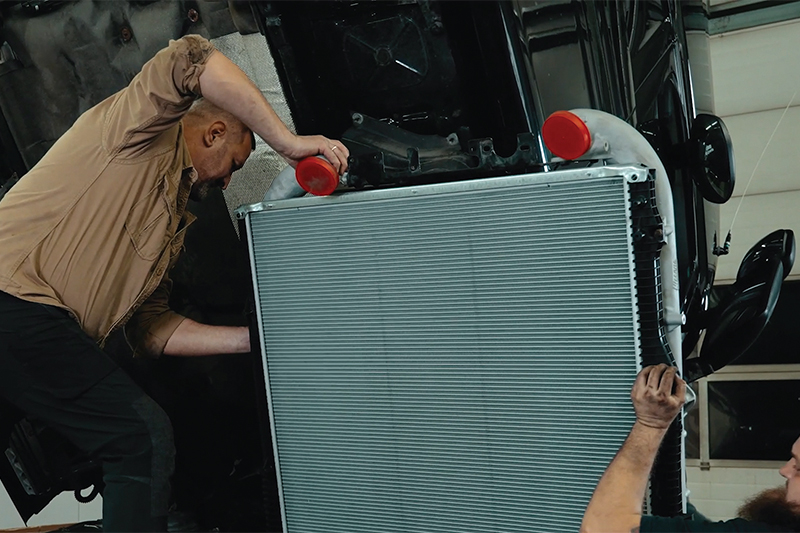
Follow along with an air conditioning compressor fault diagnosis and replacement procedure from Highway Automotive.
The compressor is central to the air conditioning system as it compresses and circulates the refrigerant around the system’s sealed loop. After the refrigerant cools down in the condenser, it flows through the thermal expansion valve (TXV) to the evaporator and then returns to the compressor for the cycle to be repeated for as long as the A/C is in use. Thanks to the thermodynamic changes that occur to the refrigerant during its circulation, it is possible to reduce the temperature inside the cab. Therefore, the optimum efficiency of the compressor is an absolute requirement for performance of the entire A/C system.
Except in rare cases of extremely high mileage, A/C compressors are generally durable components, so damage is most often due to their incorrect operation and neglect of regular A/C system service and maintenance.
Fault diagnosis
To determine whether the compressor is functioning correctly, requires a pressure gauge to be connected to both the high and low pressure ports of the A/C system. Before starting the compressor, both gauges should indicate the same pressure, typically between 5 to 7 bar, depending on the refrigerant temperature. Once the air conditioning system is turned on, the low pressure should decrease by approximately 2 to 3 bar, while the high pressure should rise to about 14 to 18 bar. However, these values may vary based on the type of system, vehicle, and ambient temperature. In addition, before checking these pressures, first ensure that the system contains the correct amount of refrigerant.
If the low pressure is higher than expected and the high pressure is lower, or if there are significant pressure fluctuations, it may indicate that the compressor is damaged.
Verifying the correct operation of the compressor control system is another essential diagnostic step. If the system uses an electromagnetic clutch, the process is straightforward: when the compressor clutch solenoid is activated, the pressure changes described earlier should be reflected. For compressors controlled by a solenoid valve, check the control signal, which is a PWM (pulse width modulation) signal, and ensure that the valve is operating correctly.
Noisy operation or refrigerant leaks may also indicate compressor damage and for more complex automatic A/C systems, will need the error memory and actual parameters of the air conditioning controller to be read using a diagnostic tester, to make an accurate diagnosis.
Compressor troubleshooting
If the compressor is found to be damaged, the next step is to recover the refrigerant from the system and remove the compressor, but the ports must be plugged immediately, to prevent moisture from entering the system.
Spontaneous and premature compressor failure is relatively rare. Therefore, the root cause of the damage must be carefully analysed and resolved before installing a replacement, so take the appropriate steps to minimise the risk of premature failure happening again.
If the compressor is seized, the entire system must be flushed in order to remove any debris and contaminated oil. However, before starting this operation, check what condenser type is built into the system. If it is a parallel flow solution, it will not be possible to flush it out thoroughly, and replacing it is recommended.
In contrast, a spiral-flow condenser can be flushed, but check its overall condition before doing so. Bent or missing fins, or visible corrosion, also qualify this component for replacement. Other components that need to be replaced when the compressor is seized include the TXV and the filter drier (container). Additionally, it is crucial to inspect the condition of the belt drive system. Pay special attention to the belt, tensioners, guide rollers, and any alternator one-way clutch.
Before installing the new compressor, check that it contains the correct amount and viscosity of oil and it is mandatory to install new sealing O-rings during the process, but ensure they are moistened with oil from the compressor.
After completing the installation, check the system for leaks using either the pressurised nitrogen or hydrogen detection (sometimes referred to as hydrogen testing) method. Then, create a vacuum to dry the system thoroughly before filling the system with the correct quantity of refrigerant. Adding too little refrigerant can reduce cooling efficiency, while too much can cause overheating or damage to the compressor.
After the installation, the AC system must be switched on and the temperature of the air being supplied to the cabin checked. In addition, the pressures should be rechecked, paying particular attention to the high pressure reading because if it’s excessive, it may indicate a low capacity in the condenser, which could quickly damage the new compressor.
Finally, in cases of significant compressor failure, such as seizure, bearing issues, or internal valve damage, immediate compressor replacement is the only realistic repair option.
Product options
Bearing in mind the extensive use and the demanding conditions they operate under, only replacement parts that are explicitly designed and reliably solve the problem, are appropriate for commercial vehicle repair, which is why Highway Automotive is part of the solution.
The company has put together a premium quality range of A/C compressors that includes more than 115 part numbers corresponding to in excess of 335 original equipment CV part numbers, primarily for various DAF, MAN, Mercedes and Scania models. The fit and finish, along with the helpful installation guide that is supplied with every compressor, ensures that they are easy to install, and each comes with a 24-month warranty.