Dayco runs us through its guide to replacing both the timing belt and auxiliary drive system in the 2.3-litre diesel engine used in both the Fiat Ducato and Iveco Daily.
The 2.3-litre diesel engine used in the popular Fiat Ducato since 2002 and the equivalent Daily produced by Iveco, is fitted with a Dayco High Tenacity (HT) or ‘white’ timing belt as the original equipment component.
As replacing the belt also requires the auxiliary drive system to be removed, Dayco recommends that all the systems’ components – timing and auxiliary drive – be replaced at the same time.
Installation guide
This step-by-step technical guide will help technicians through the process, to avoid complications and ensure a first-rate job.
As with all primary drive system jobs, the work should be undertaken when the engine is cold, so ideally the vehicle will not have been run for at least four hours.
From under the vehicle, remove the case to expose the air conditioning compressor and outer auxiliary belt, followed by the cowling under the right-hand wing to gain access to and remove the belt.
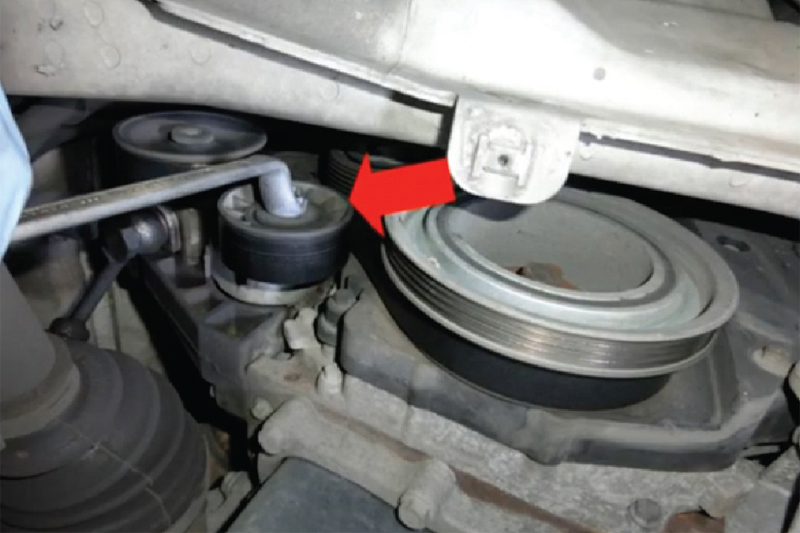
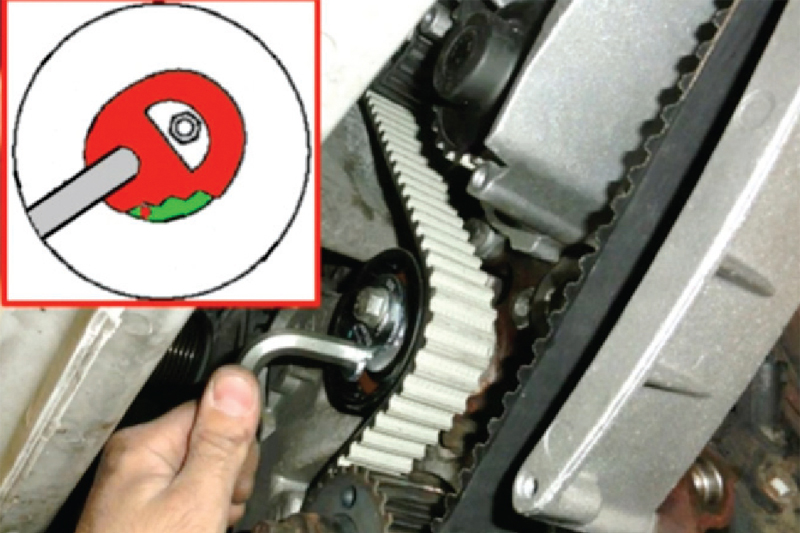
By using a spanner on the automatic tensioner to reduce the tension on the inner auxiliary belt (Fig. 1), remove the belt, then the tensioner and the idler, followed by the crankshaft pulley, which is secured by four bolts.
Remove the valve cover on top of the engine and, in order to move them out of the way, detach the coolant and steering fluid reservoirs from the bracket and then remove the bracket to access the top engine mount. Suitably support the engine from below and remove the top mount and then the plastic timing belt cover to expose the timing drive system.
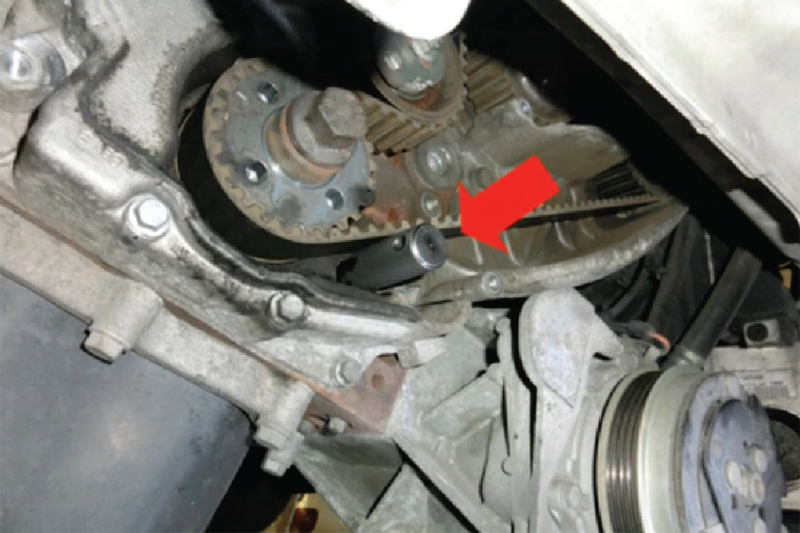
To aid the removal of the existing timing belt, remove the front right headlamp unit and then insert the crankshaft timing tool into the hole adjacent to the crankshaft pulley (Fig. 2) and the two camshaft timing tools through the holes in the top of the valve cover. Secure the camshaft pulley with the appropriate tool and slacken the pulley bolt, which while remaining centred should allow the pulley to rotate on the camshaft end.
Slacken the tensioner bolt and remove the belt, followed by the tensioner and the toothed idler. Replace the old toothed idler with the new one in the Dayco KTB339 kit and tighten the bolt to 35Nm of torque, then install, but do not tighten, the new tensioner.
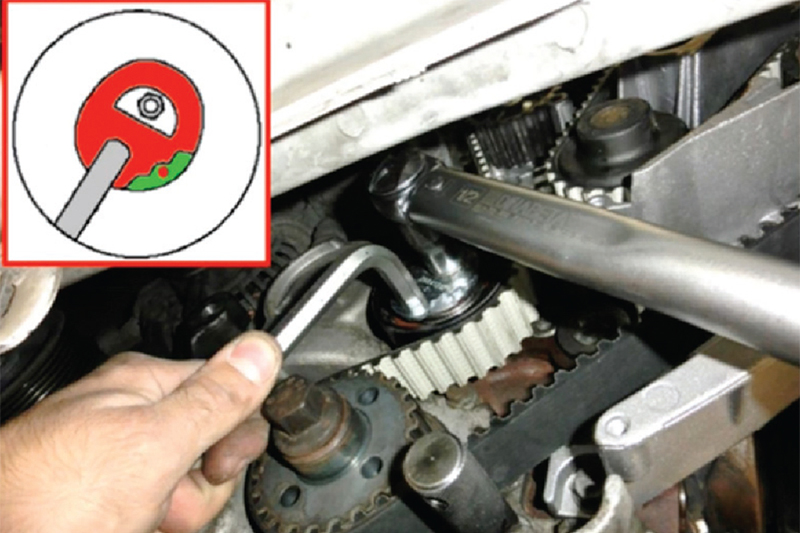
Secure the camshaft pulley with a 5mm Ø pin and fit the new HT belt with the timing mark on its back aligned to the timing mark on the camshaft pulley and following the direction of rotation arrows, leaving the slack side of the belt facing the tensioner. Then remove the camshaft pin and, using an Allen key, rotate the tensioner so that the small red dot is in the position shown (Fig. 3) and temporarily fasten the tensioner.
Again using the appropriate tool, tighten the camshaft pulley to 90Nm of torque and then remove the crankshaft and camshaft timing tools and rotate the engine eight complete rotations and reinsert the timing tools.

Rotate the tensioner so that the small red dot is positioned in the secondary position (Fig. 4) and tighten the fastening bolt to 35Nm of torque. Remove the timing tools, rotate the engine another two complete rotations and check that the timing tools can be reinserted, which will ensure that the valve timing is correct. Naturally repeat the process should the tools fail to locate correctly.
Once the correct timing has been achieved, remove the timing tools and reassemble the components in the reverse order of their removal, but check and, if necessary, replace the auxiliary belt crankshaft pulley Dayco DPV1031, idler Dayco AVP1074 and tensioner Dayco APV1075. However, Dayco recommends that the two auxiliary belts Dayco 7PK1076 and 4PK903EE (an elastic belt) are always replaced.