Knorr-Bremse provides a step-by-step guide to the key service requirements of clutch air compressors.
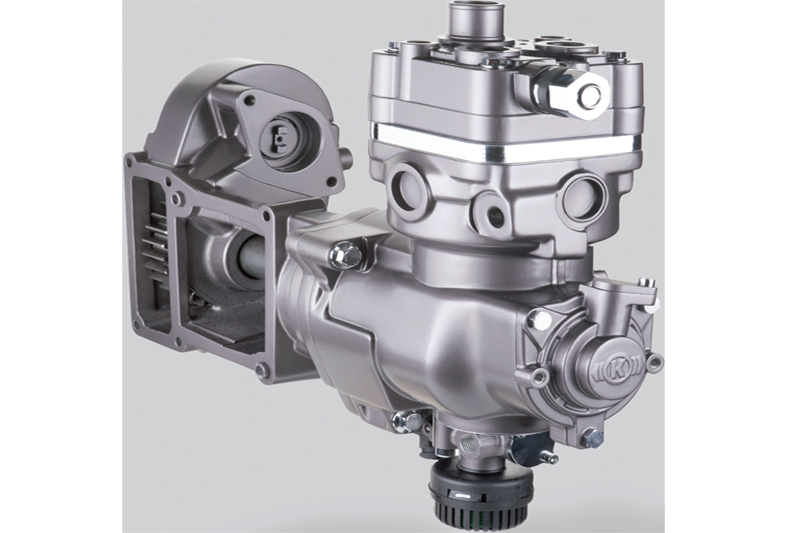
Clutch compressors avoid idle running phases. Instead, there are standby periods, during which the engine output is physically separated from the compressor, thereby saving energy. Maintaining clutch compressor performance depends primarily on ensuring peripherals such as air filters, intake lines, pressure lines, leaks in the system, oil quality and pressure, and the cooling system of the compressor are kept in good condition.
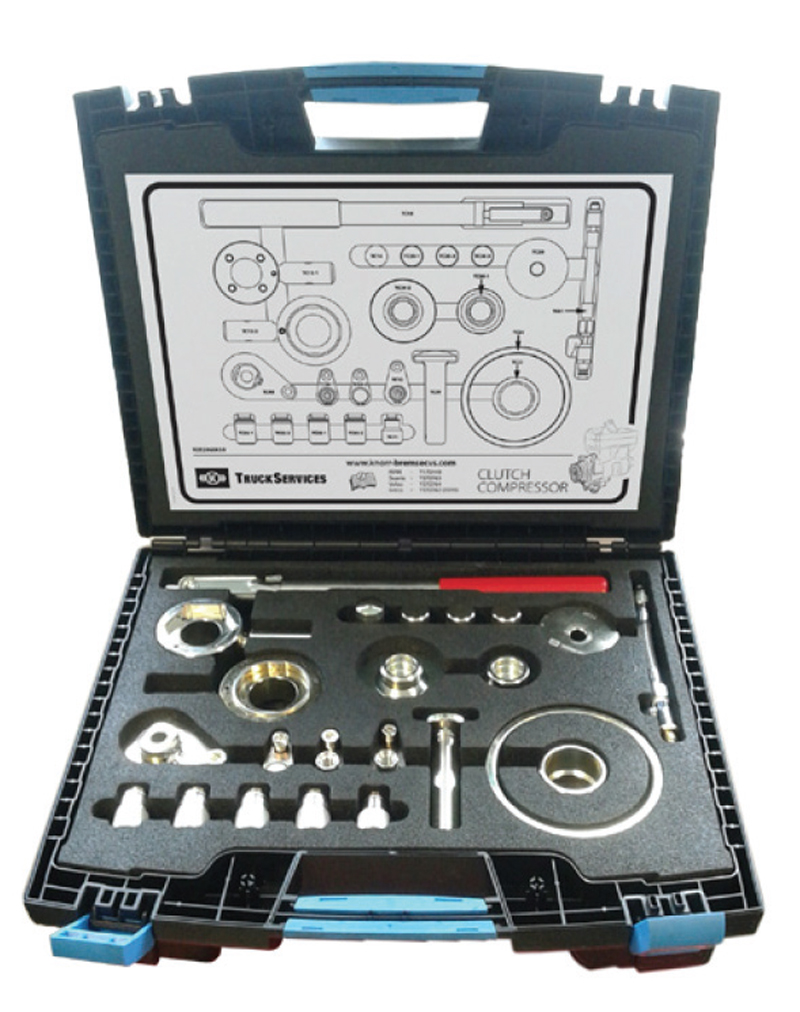
When servicing is required, you’ll need a special tool kit with specially developed tools that make the job easier and help avoid damage to components:
TC13/TC13-1 – A combined tool for clutch assembly/ disassembly TC20 – A protective mechanism for pressing out the actuation piston
TC21/TC22 – An installation aid for actuation piston
TC40 – A pressing-in tool for installing the retaining ring including backing plate for fastening the drive gear. Additionally, you will need a torque wrench for the clutch assembly.
STEP 1
Clutch and actuation piston removal
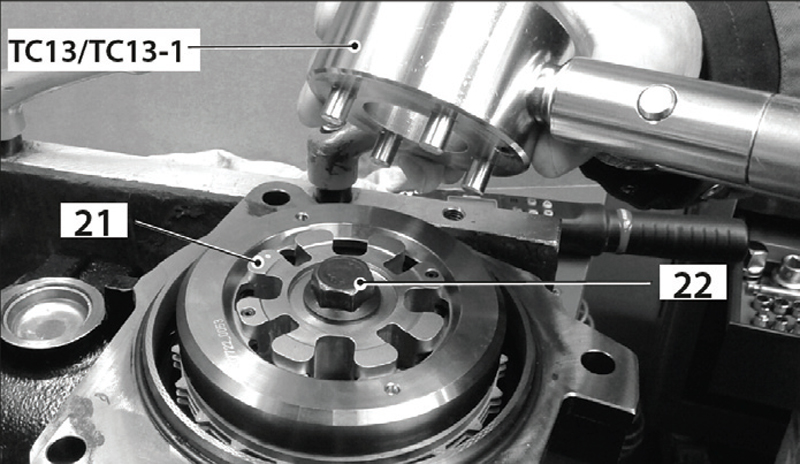
1. Place the TC13/TC13-1 into the slots of the clutch (21).
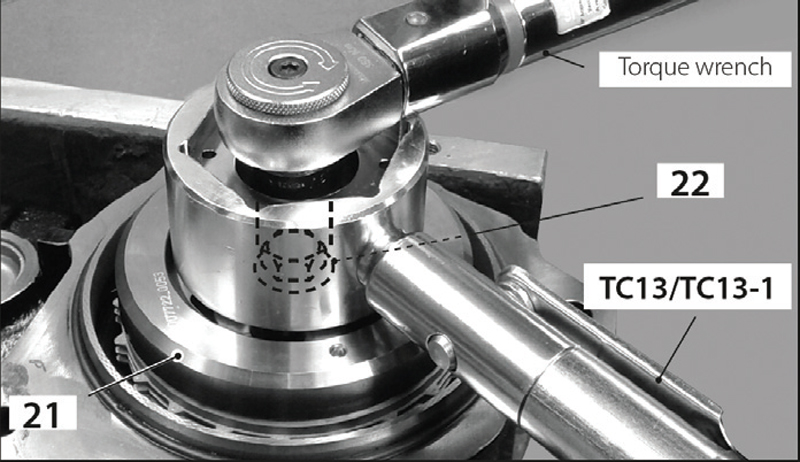
2. Whilst holding the TC13/TC13-1 tool in position, unscrew the fastening bolt (22) using an 18mm torque wrench.
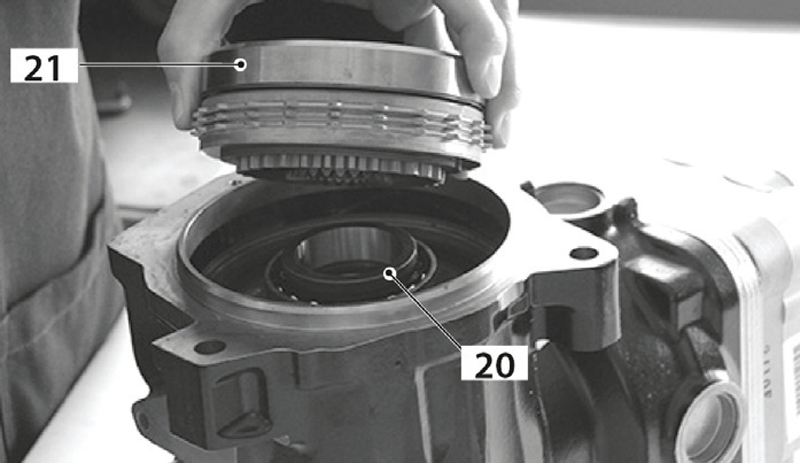
3. Remove the clutch (21) and release bearing (20).
STEP 2
Actuation piston replacement
At this point the actuation piston can be replaced if necessary.
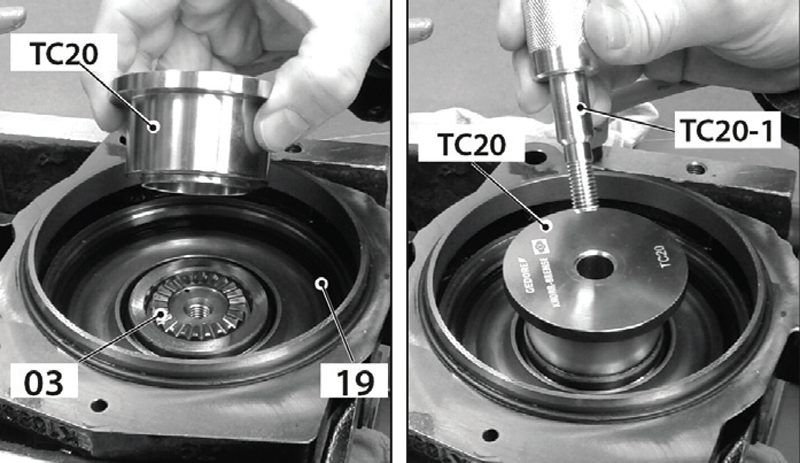
4. Place TC20 tool onto the crankshaft (03) and hand-tighten in place using the TC20-1 tool.
5. Dismount the solenoid valve.
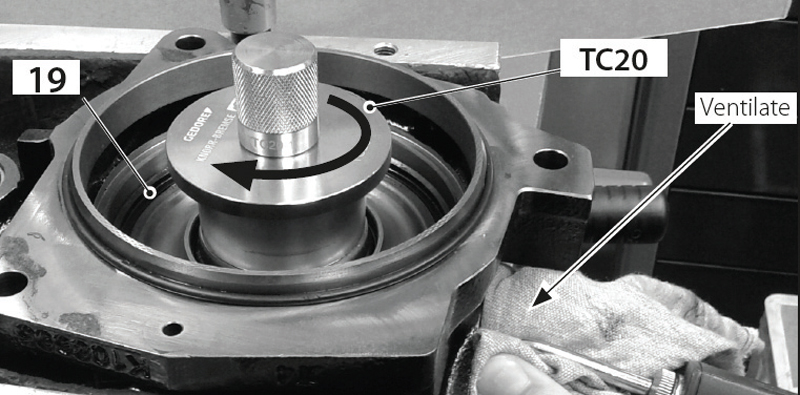
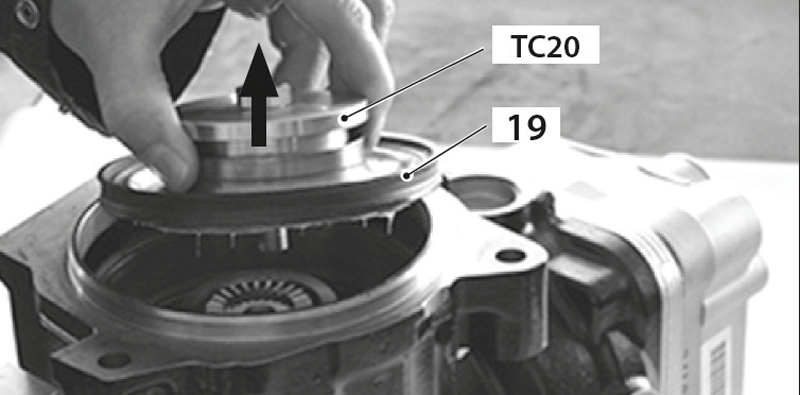
6. Gradually and carefully press out the actuation piston (19) by repeatedly ventilating and turning the TC20 tool.
Warning! Carefully remove actuation piston (19) without causing damage to other surfaces. Do not tip it! The actuation piston can only be removed vertically in order to avoid damage to itself or other surfaces.
STEP 3
Replacing the clutch
Tools TC21 and TC22 are required for installation of the clutch
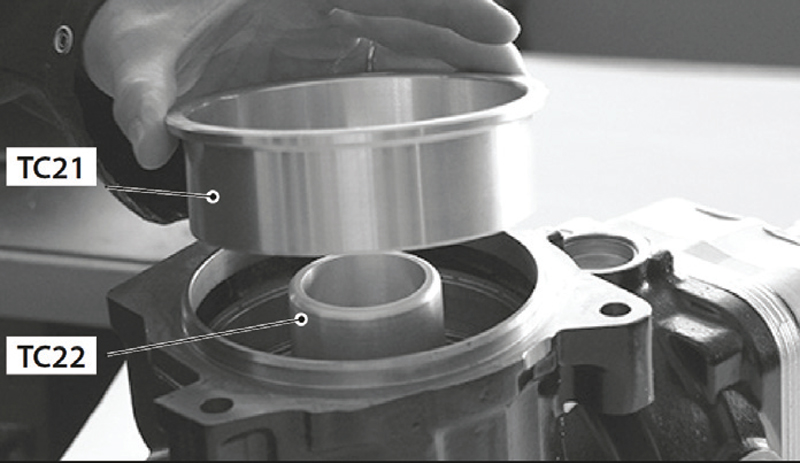
1. Insert tools (TC21) and (TC22) as shown…
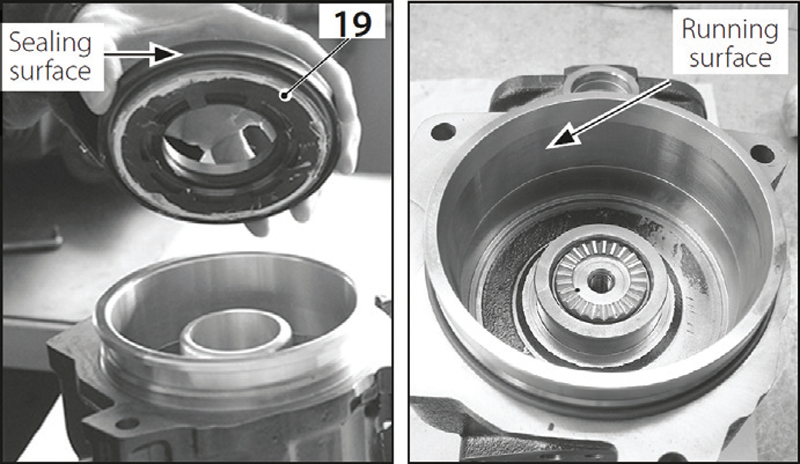
2. Clean the sealing surface of the actuation piston (19) and the running surface on the compressor. Apply a little motor oil to both the running surface of the compressor and the seal on the actuation piston to ease installation.
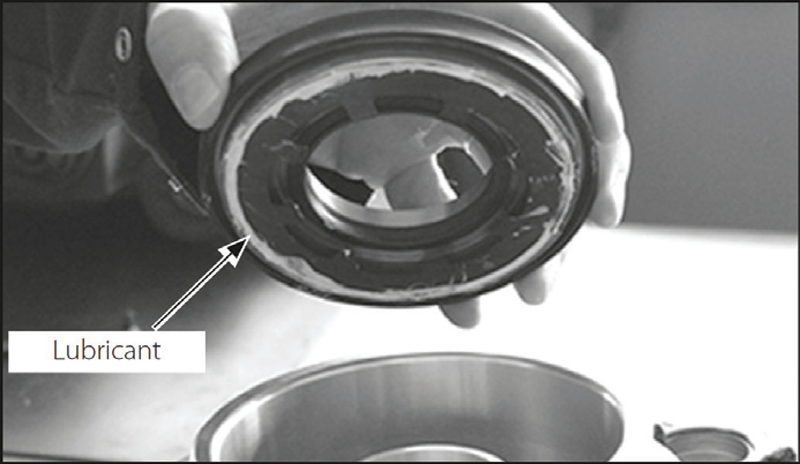
3. Grease the actuation piston with the lubricant included as shown.
NOTE! The actuation piston (19) can only be mounted vertically without damage. Do not tip it.
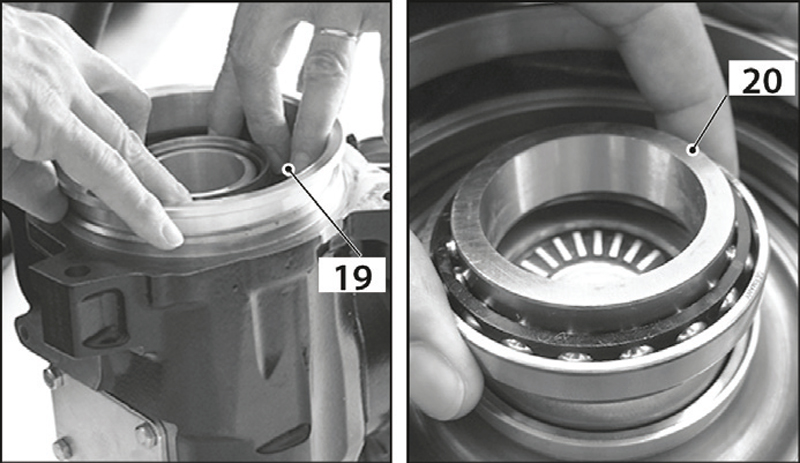
4. Carefully mount the actuation piston (19) as far as it will go by hand and then Insert the release bearing (20).
Remove tools TC21 and TC22
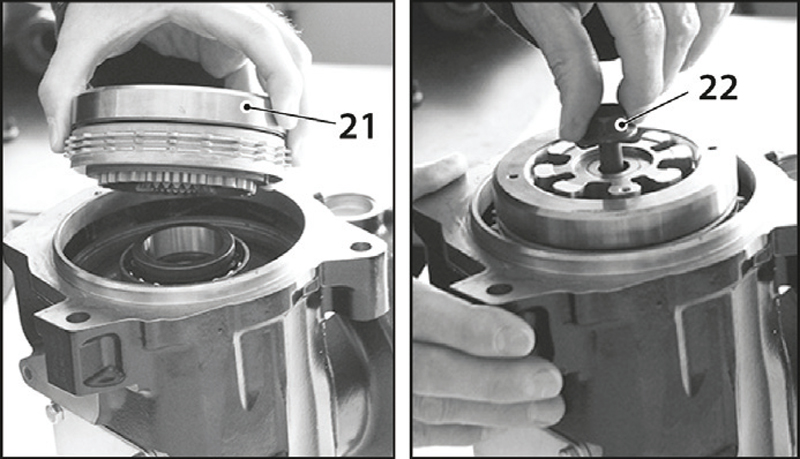
5. Refit the clutch (21) and hand-tighten in place using bolt (22).
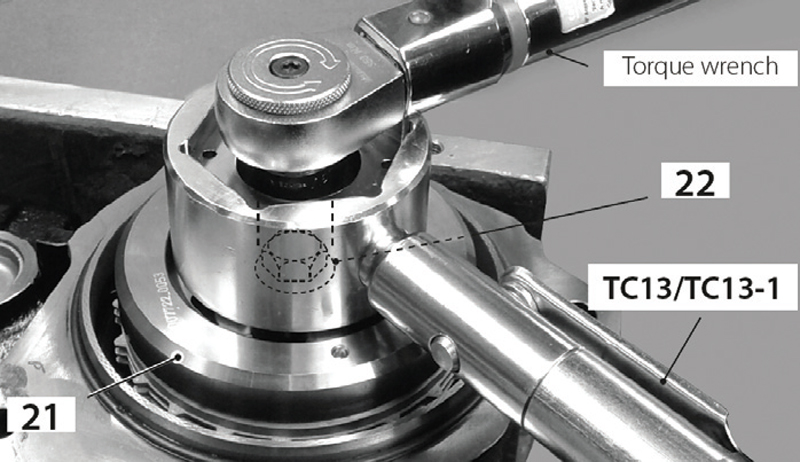
6. Insert the TC13/TC13-1 combination tool into the groves of the clutch (21). Tighten to a torque of 15 Nm + 60° for M10 screw and 55 Nm + 45° for M12 screw.