Induction Innovations walks us through a step-by-step guide to safely removing a rusted, corroded nut near fuel lines.
The traditional approach of using an oxy-acetylene torch is out of the question when in a tight space or near fuel lines. Using an open flame in a confined space vastly increases the consequential fire risk – plastics, wiring, trim, and fumes around the part to be removed can catch fire, potentially causing costly damage or injuries.
Safe removal
The good news is that this process has never been easier or more efficient than with the help of the Mini-Ductor product line.
The Mini-Ductor tool uses high-frequency magnetic fields to quickly heat the ferrous metal to release it from corrosion or thread-lock compound, without the dangers of open flame. Heat is localised on the part and not the surrounding area, which results in less collateral damage as compared to a torch. Another benefit of this localised heat is that parts can be reused – saving the user money.
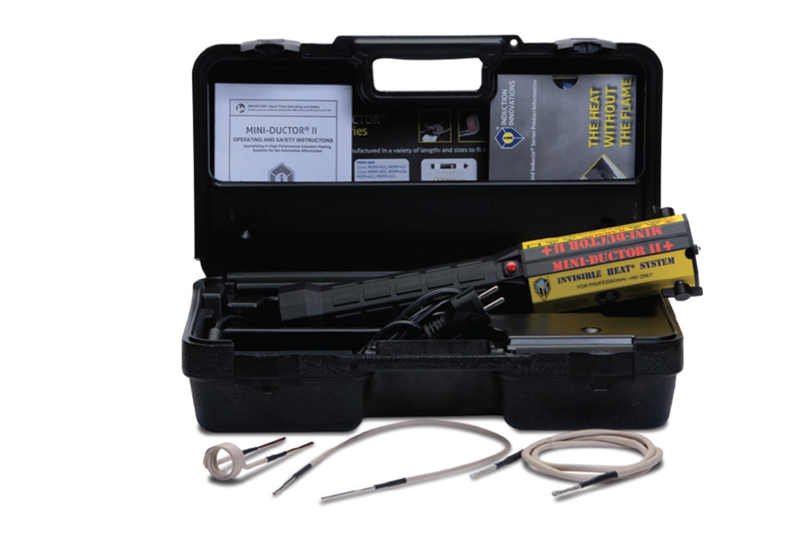
Available models
The Mini-Ductor is the professional’s choice handheld, flameless torch and the ideal tool for commercial workshops due to its power source. The models include the Mini-Ductor II, Mini-Ductor Venom, and the portable Mini-Ductor 12V, which works off a 12-volt battery pack, or a van or truck battery.
The Mini-Ductor II and 12V both feature an inline design which helps reach those tighter areas such as fuel lines. Both tools fasten coils with thumbscrews, have a pushbutton activation and an LED work light. They also include a one-year manufacturer’s warranty.
The Mini-Ductor Venom features an angled, pistol grip design to better reach those tight areas where torches can’t go. The Venom includes trigger activation, a coil Twist-Lock which locks coils into place with one easy turn and a two-year warranty. The Venom also has a fault monitor LED light to indicate if the tool is working properly.
Flexible coils
Each Mini-Ductor kit is supplied with three bendable coils, including a 7/8” pre-formed coil, 23” U-form coil, and 41” bearing buddy. These coils are flexible and able to be bent or separated. The U-form coil and bearing buddy allow the user to wrap the coil to fit any application.
These coils are ideal for getting into awkward areas and thin enough to wrap around the nut and heat it for easy removal. For example, a 19mm nut is heated red hot in seconds. The heat expands the nut and breaks down any corrosion bonds. All coils are coated to eliminate oxidation and resist abrasion if used properly. Step-by-step guide Note: Read the safety and operating manuals before using the Mini-Ductor tools, a well-reviewed proficiency of these documents is necessary for proper usage.
Step-by-step guide
Note: Read the safety and operating manuals before using the Mini-Ductor tools, a well-reviewed proficiency of these documents is necessary for proper usage.
Step 1 – First, make sure the fuel lines are not leaking or creating a vapour.
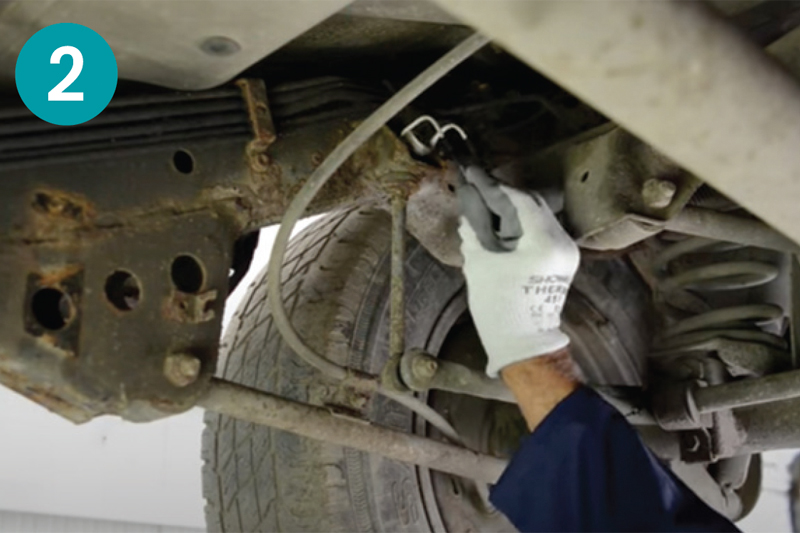
Step 2 – Select the correctly sized coil to fit the application. Bend the leads of the coil to the correct shape for ease of use. Warning: Do not use coils with breaches in the insulation. You could cause arcing and the unit to short out. Always check for breaches before using your coils.
Warning: Do not use coils with breaches in the insulation. You could cause arcing and the unit to short out. Always check for breaches before using your coils.
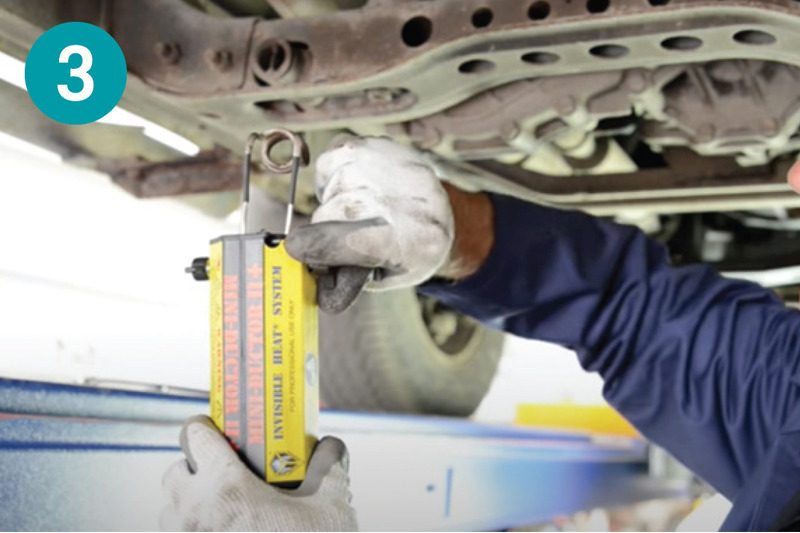
Step 3 – Tighten the coil into the unit with thumbscrews or lock it into place with the twist-lock.
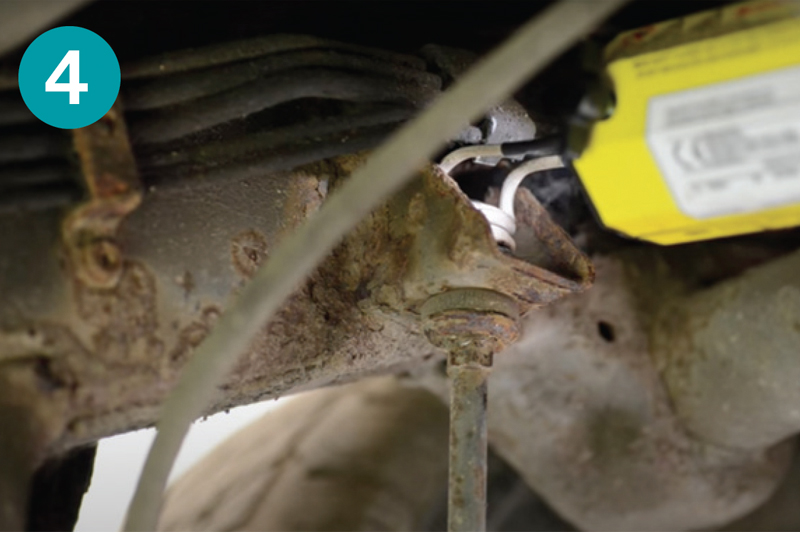
Step 4 – Run the unit according to the recommended duty cycles. Only heat the nut enough to expand and loosen – red hot is too hot!
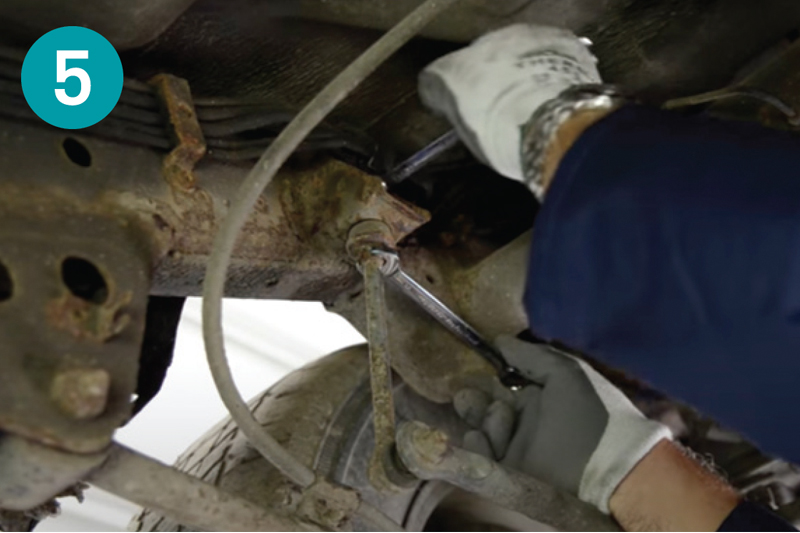
Step 5 – Select the correct tools, such as a wrench, to loosen the nut.
Caution: Remove the nut whilst it is still hot.