Juratek offers some useful advice to technicians when servicing air springs. The company warns that a service should never be attempted while an air spring is inflated.
Routine Inspection:
- Check all air lines for leaks.
- Check air springs have enough clearance when inflated. Misaligned suspension parts rubbing on the air springs will cause the diaphragm or bellow to wear away.
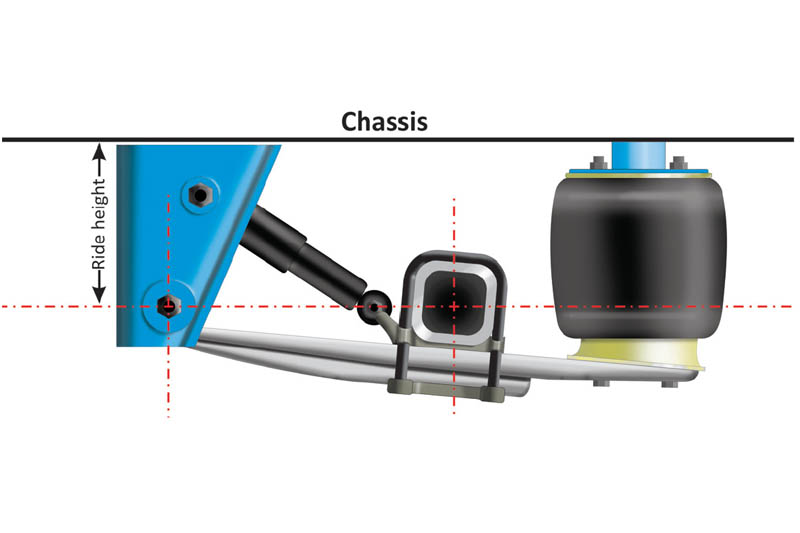
- Check the original specification for the suspensions ride height, as in Fig. 1. This should be maintained to protect the air springs and shock absorbers from over extension.
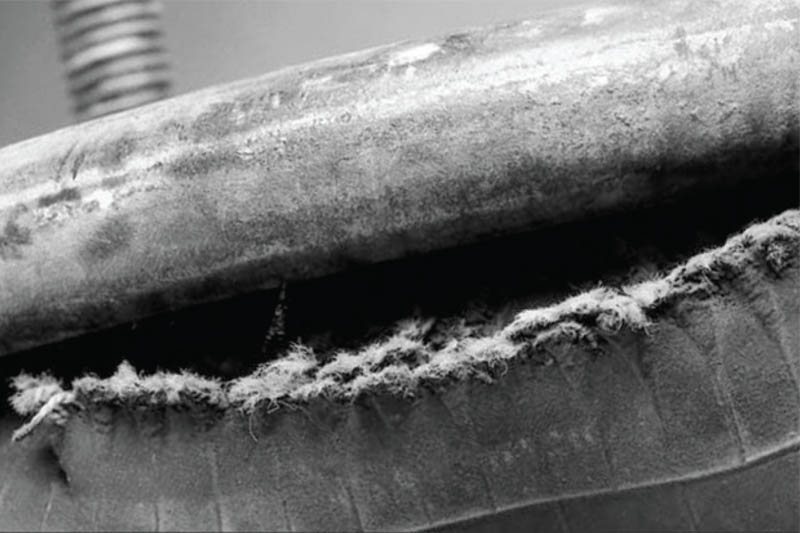
- Check the diaphragm or bellow for irregular wear, natural wear or outside interference.
- Clean the diaphragm or bellow with a non-petroleum based solution.
- Check the piston (on rolling lobe type air springs) for sharp edges, settlement of dirt or foreign bodies.
- Check shock absorbers for over extension, bush wear and fluid loss. If the unit can be easily compressed or extended it will not function correctly. If the vehicle has recently been in use the shock absorber should be warm to the touch. If this is not the case, the unit may need to be replaced.
- Check all torque settings are correct to original specification.
- Check height control valve function.
- Mounting fixing bolts and nuts should be replaced at every inspection.
Causes of failure
The vast majority of premature failures and consequent warranty returns are found to be caused by a lack of suspension maintenance, incorrect installation or other associated problems, rather than faulty products.
Before installing a new air spring, it is recommended to carefully examine the cause of the failure. If the cause is not rectified, this will result in the failure of the newly installed air spring.
The information here is a guide to the most common air spring failures, which are not covered by warranty.
Loose girdle hoop
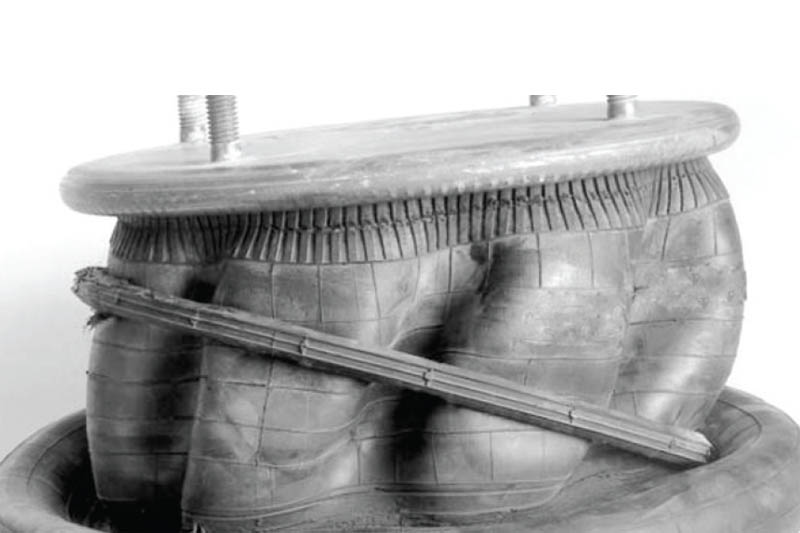
Appearance:
- Rubber bellows distorted
- Girdle hoop torn loose
Possible Cause:
- Running at extended positions with low air pressure
Circumferential abrasion
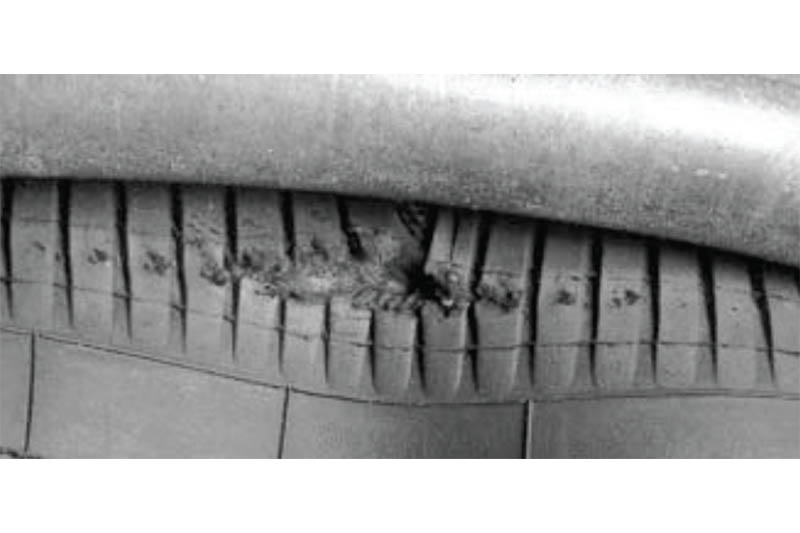
Appearance:
- Hole is diaphragm or bellow below bead plate
Possible Cause:
- Misaligned bump stop
- Worn suspension bushes
- Incorrect installation
Chafing between bead plate and bellow
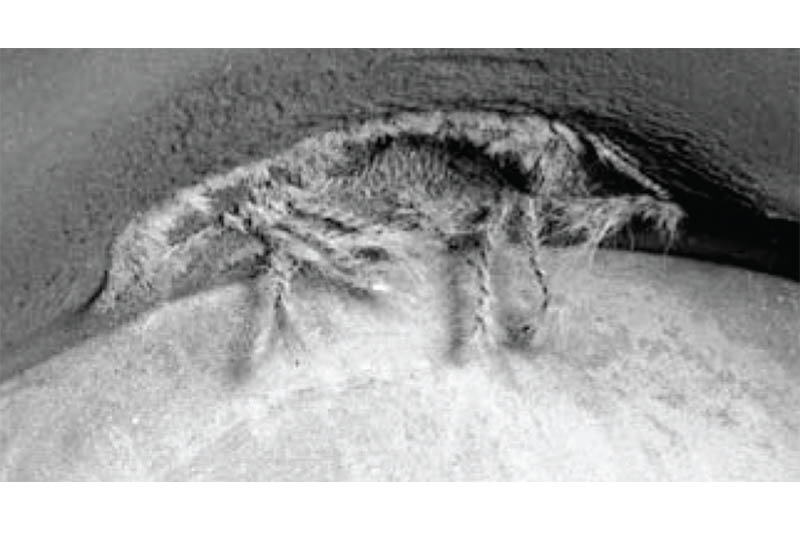
Appearance:
- Hole is diaphragm or bellow at bead plate junction
Possible Cause:
- Misaligned bump stop
- Worn suspension bushes
- Incorrect installation
Bottoming out
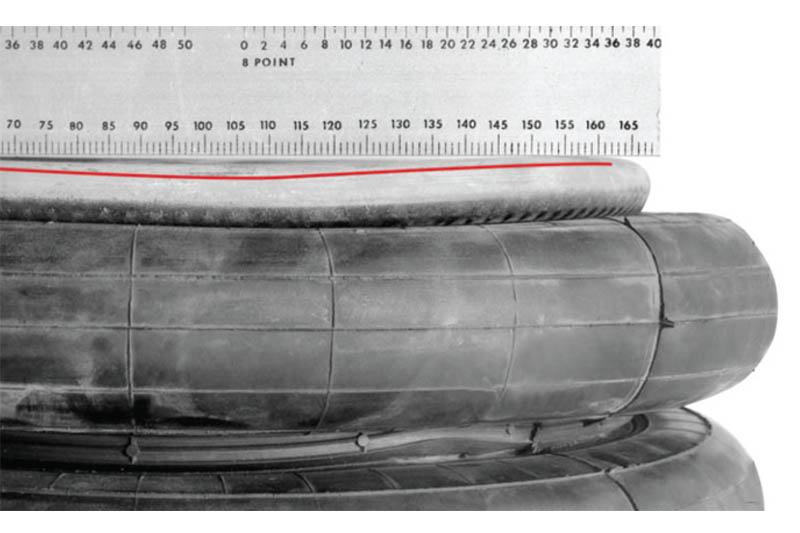
Appearance:
- Bead plate concave (see red line)
- Internal bumper loose
- Hole in girdle hoop area
Possible Cause:
- Broken or defective shock absorber
- Defective levelling valve
- Overloaded vehicle
- Pressure regulator set too low
- Incorrect air spring fitted
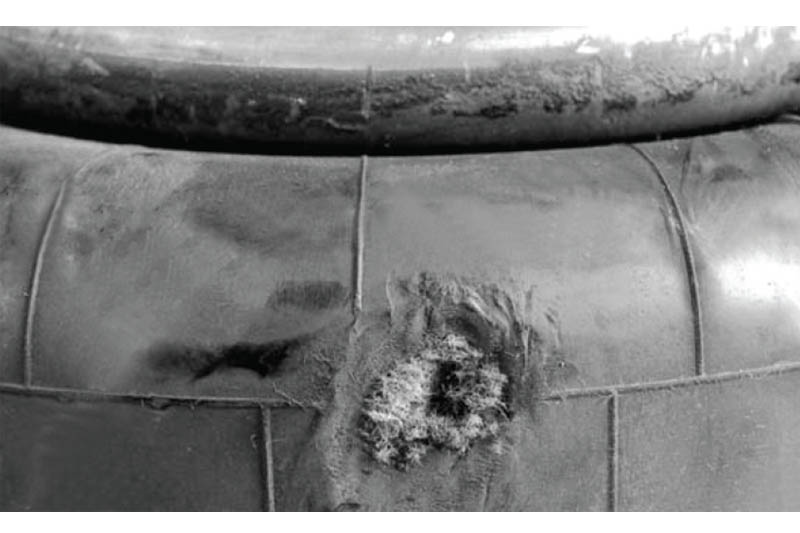
Abrasion
Appearance:
- Hole rubbed into side of diaphragm/bellow
Possible Cause:
- Structural interference (broken shock absorber, loose airline, misalignment, worn bushes)
- No air pressure (rolling lobe type)
- Foreign material
- Incorrect air spring fitted
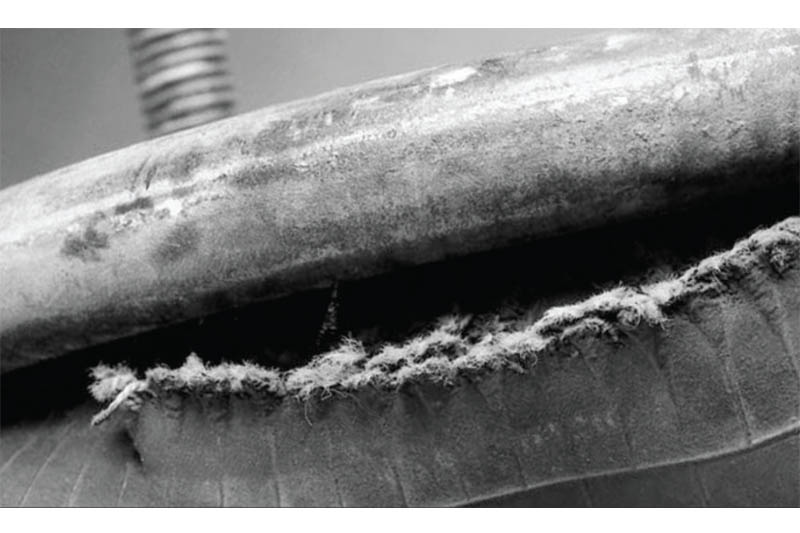
Circumferential cuts
Appearance:
- Bellows cut along bead plate junction
- Bellows cut along piston junction
Possible Cause:
- Running at full extension with high air pressure for extended periods of time
- Impact in compressed position
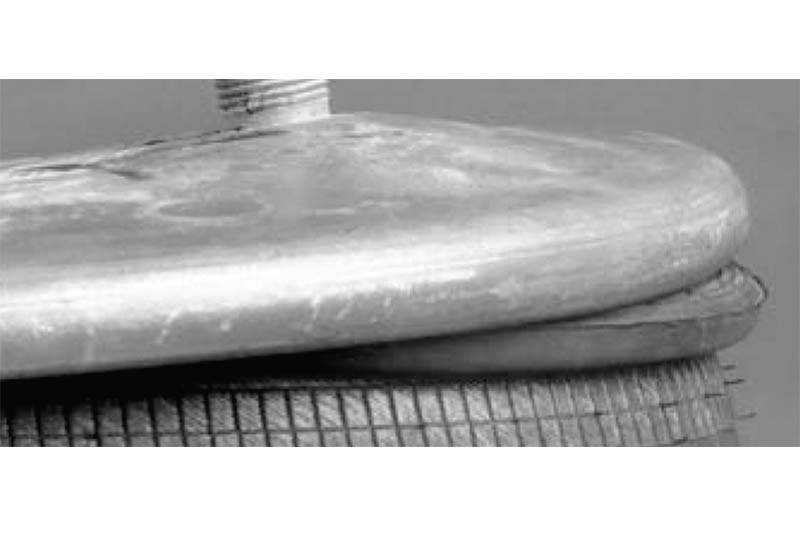
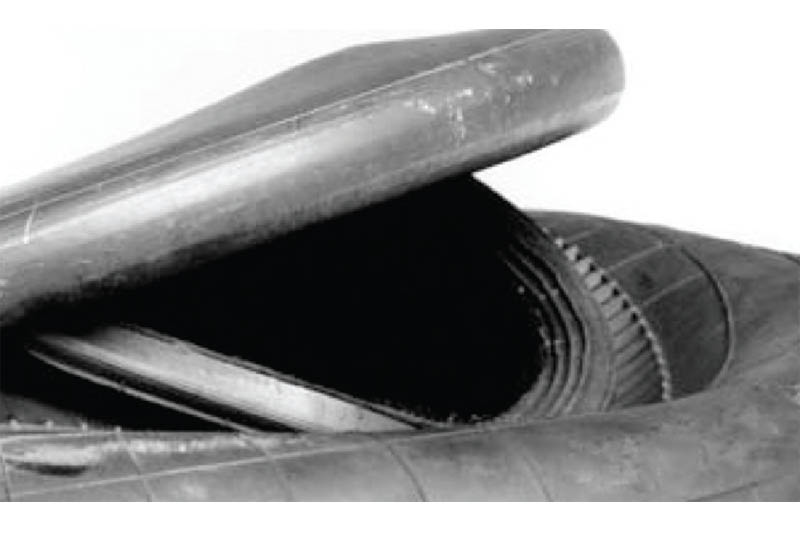
Over extension
Appearance:
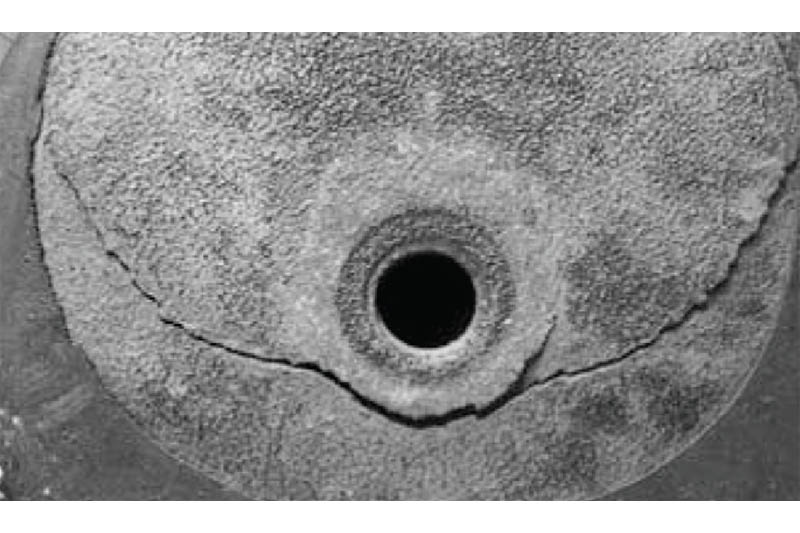
- Bead plate convex, especially around blind nuts or studs (Fig. 2)
- Rubber bellows separated from bead plate (Fig. 3)
- Leaking at blind nuts or studs (Fig. 4)
- Leaking at end closure (Fig. 4)
- Loose girdle hoop on convoluted style
Possible Cause:
- Broken shock absorber
- Incorrect shock absorber fitted
- Defective levelling valve
- Ride position set too high
- Incorrect air spring fitted
Preventative Measures
Listed below are items that can be checked when the vehicle is in for periodic maintenance:
- Inspect the outer diameter of the air spring. Check for signs of irregular wear or heat cracking.
- Inspect air lines to make sure contact doesn’t exist between the air line and the outer diameter of the air springs. Air lines can rub a hole in the air spring bellow.
- Check to see that there is sufficient clearance around the complete circumference of the air springs while at its maximum diameter.
- Inspect the outer diameter of the piston for build-up of foreign materials (on a reversible sleeve style air spring the piston is the bottom component of the air spring).
- Correct ride height should be maintained. All vehicles with air springs have a specified correct height established by the OE manufacturer. The height, which is found in the service manual, should be maintained within . inch. The dimension can be checked with the vehicle loaded or empty.
- Levelling valves (height control valves) play a large part in ensuring that the total air spring system works as required. Clean, inspect and replace if necessary.
- Make sure you have the correct shock absorbers and check for leaking hydraulic oil and worn or broken end connectors. If a broken shock absorber is found, replace it immediately. The shock absorber will normally limit the rebound of an air spring and prevent it from over extending.
- Check the tightness of all mounting hardware (nuts and bolts). If loose, retorque to the OE manufacturer’s specifications. Do not overtighten.
- When cleaning, only use approved cleaning methods (these include soap, water, methyl alcohol, ethyl alcohol and isopropyl alcohol)

