Regular brake condition inspections can ensure a long-life and trouble-free operation. Here is part one to Knorr-Bremse’s step-by-step guide.
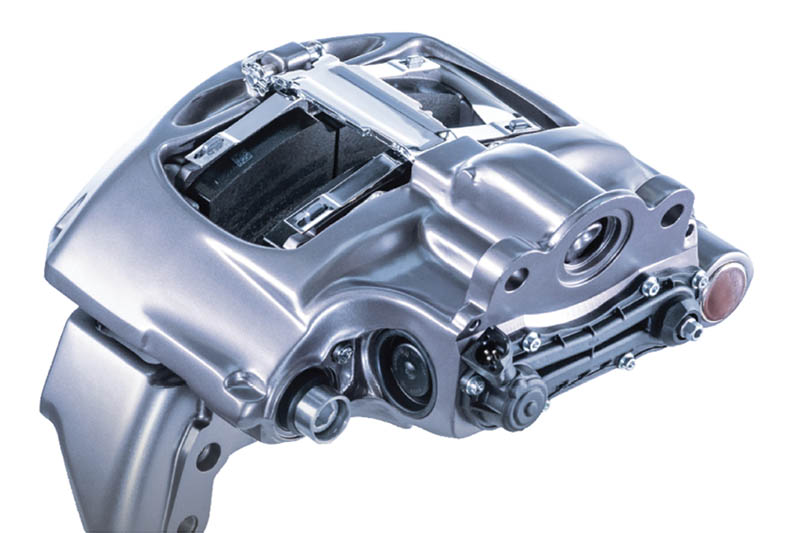
The SL7 and SM7 brake calipers have been fitted to Actros and Axor models since around 2011. There are two different-sized brake calipers mounted on one vehicle to take into account the effects of dynamic axle load distribution during the braking process.
The performance-optimised SM7 brake with its larger caliper and brake pads is fitted on the front axle or axles, whilst on the rear, the weight-optimized SL7 brake is used. Be aware that, as the calipers are different sizes, the brake pad kit part numbers are different for the SL7 and SM7 and the tappet kit needed is different from that used for SN7 calipers.
Every three months, the pad wear must be checked visually and independently of any wear indicator fitted to the vehicle.
At every pad replacement, check for the correct functioning of the adjuster and the smooth operation of the caliper over its full range of movement, inspect the tappet and boot assemblies, as well as the adjuster cap and the sealing elements for correct fitting and condition, plus the caliper bearing around the rubber bush/guide sleeve.
Annually, check the caliper running clearance and the correct fitting and condition of the cover and the adjuster cap.
These frequencies are a minimum and, depending on the vehicle application, a more frequent check of the components may be necessary. The discs should be checked according to the specification of the axle or vehicle manufacturer, so refer to these for service intervals.
Brake pad wear check
For optimum safety, the pad and disc wear limits must not be exceeded.
Brake pads
The thickness of the pads must be checked regularly dependent on the usage of the vehicle. Even if a wear indicator is fitted and connected, this must be at least every three months. If the minimum allowed thicknesses are reached, brake pads must be replaced as an axle set.
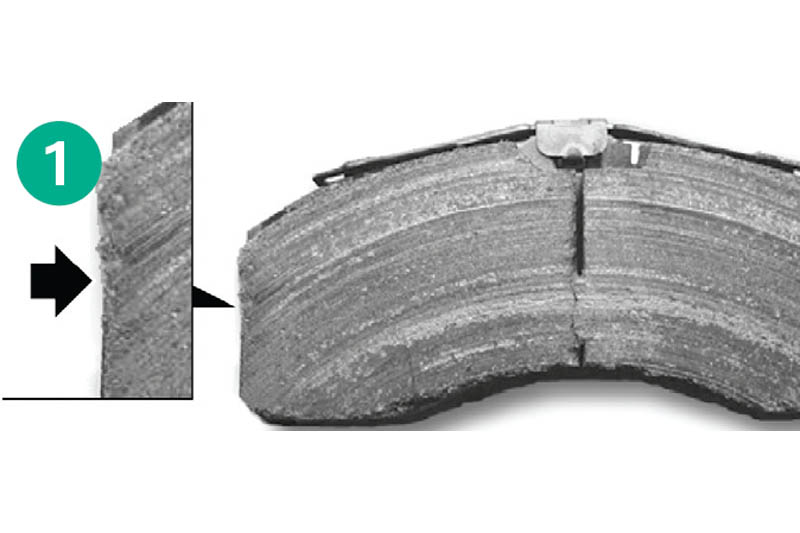
Fig. 1 – Minor breakouts at the edges are permitted.
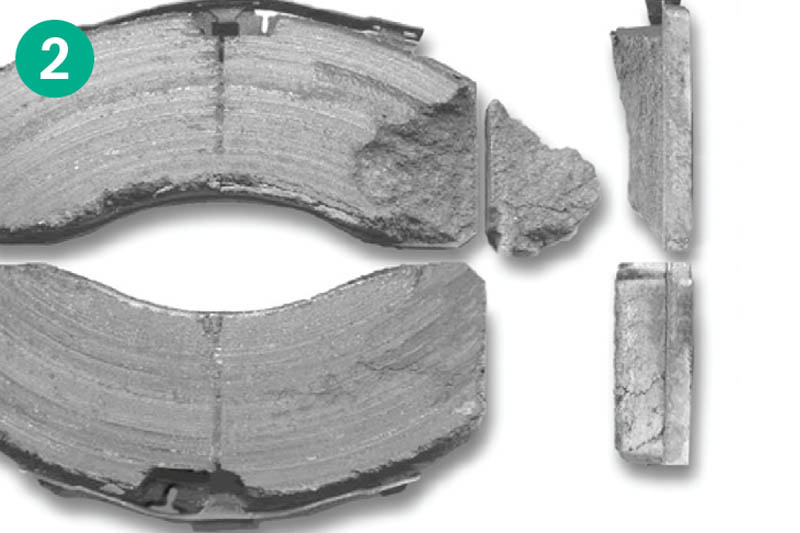
Fig. 2 – Major breakouts on the surface of the brake pad are not permitted.
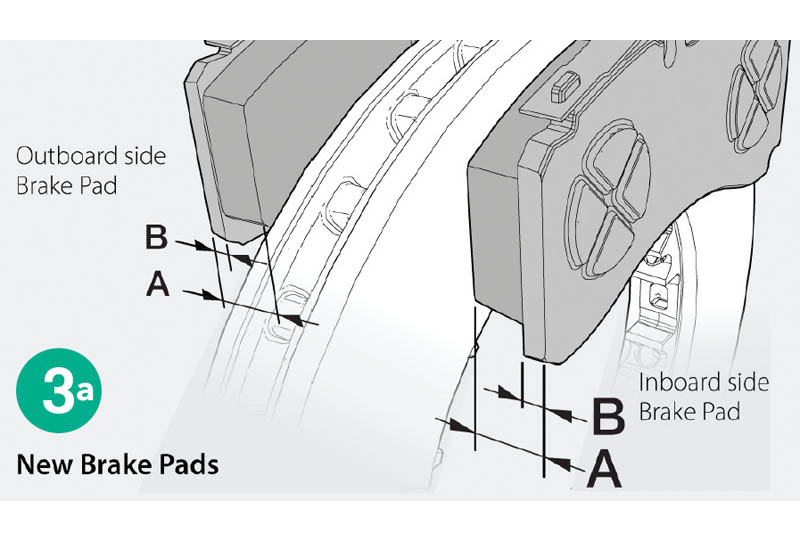
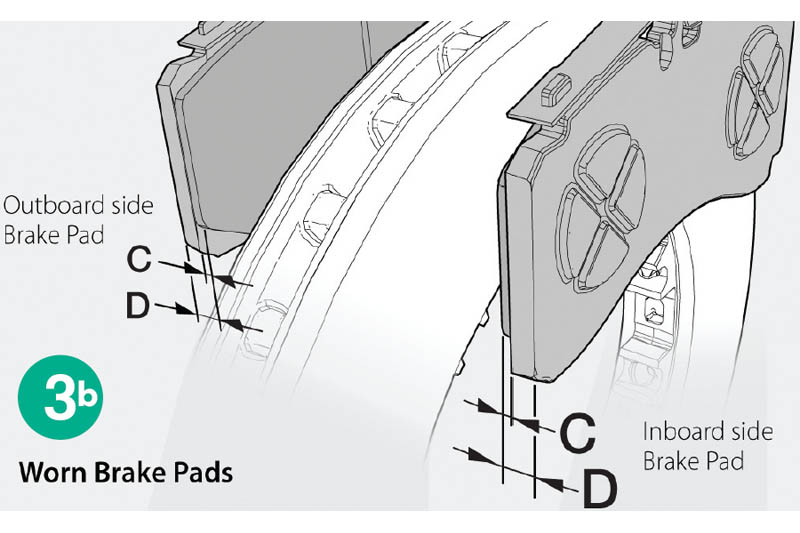
Fig. 3 – If the thickness of the friction material is less than 2mm (C), the pads must be replaced.
A – New brake thickness is 30mm overall
B – Backplate 9mm
C – Minimum allowed thickness of friction material is 2mm
D – Minimum allowed thickness in worn condition for backplate and friction material is 11mm
Exaggerated wear difference between inner and outer brake pads
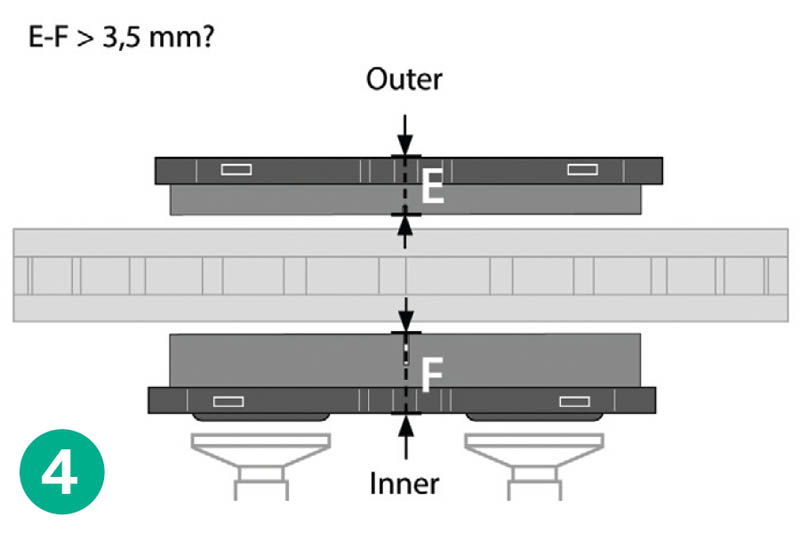
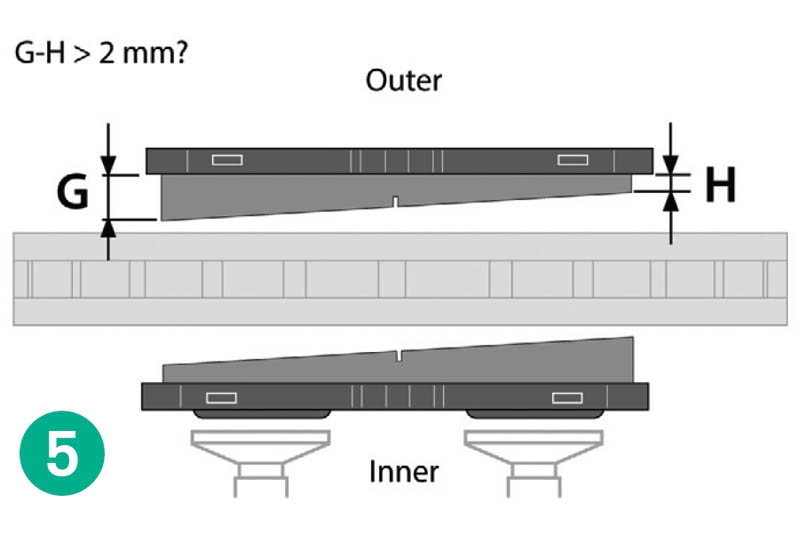
Fig. 4 – The total thickness of the friction material of the inner and outer pad should be equal. If the difference between the two pads is greater than 3.5mm, check:
- Bearing clearance
- Free movement of the brake pads in the caliper
- Possible collision with other parts on the axle or vehicle body
- Excessive dirt and grime present
- Piping of the compressed air line
Exaggerated uneven wear of brake pads
Fig. 5 – The total thickness of the friction material at either end of the pad should be equal. If the difference between the two ends is greater than 2mm, the brake pads must be replaced. In this example: G=21mm, H=18mm > NOT OK, but G=18mm, H=19mm > OK. Also, check the same A-E list as explained in Fig. 4.
Wear checks for vehicles with ribbed rubber bush and double roller bearing brake pad/disc wear check
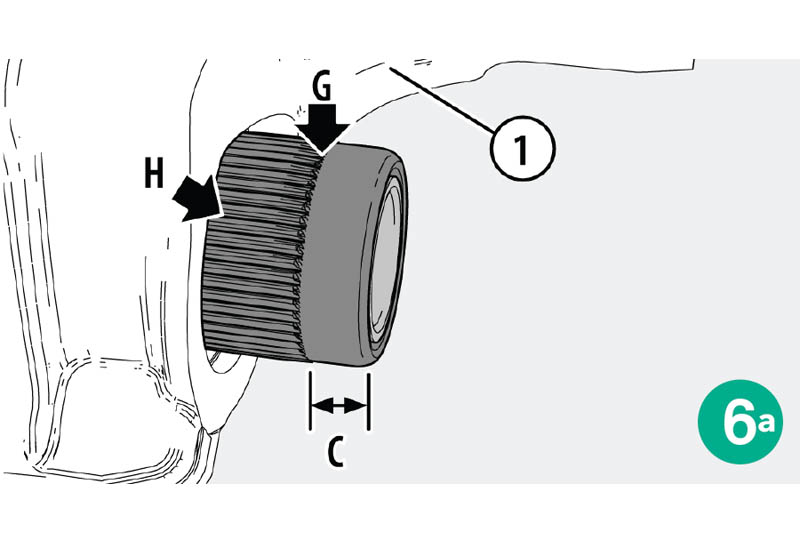
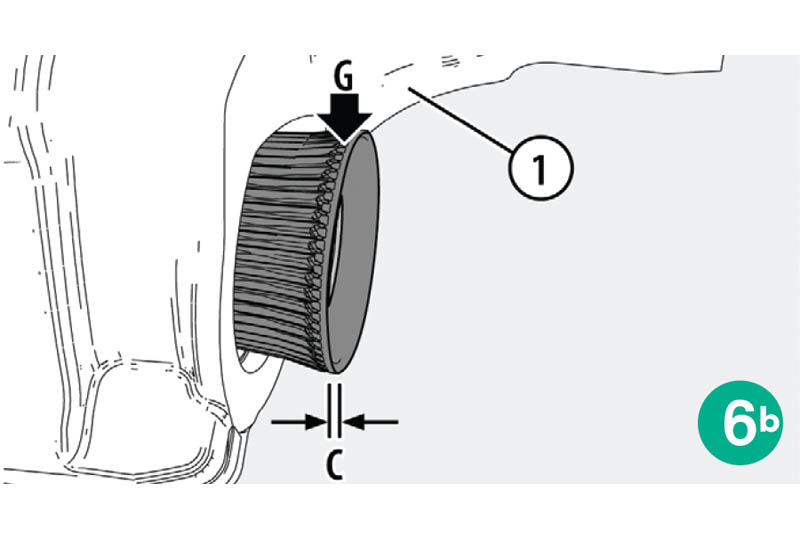
Fig. 6 – Some vehicles have disc brakes fitted with double roller bearing and a ribbed rubber bush (arrow H). This allows the pads/disc wear to be visually determined without removing the wheel. G shows the wear marker point where the bush changes from a ribbed to a smooth surface.
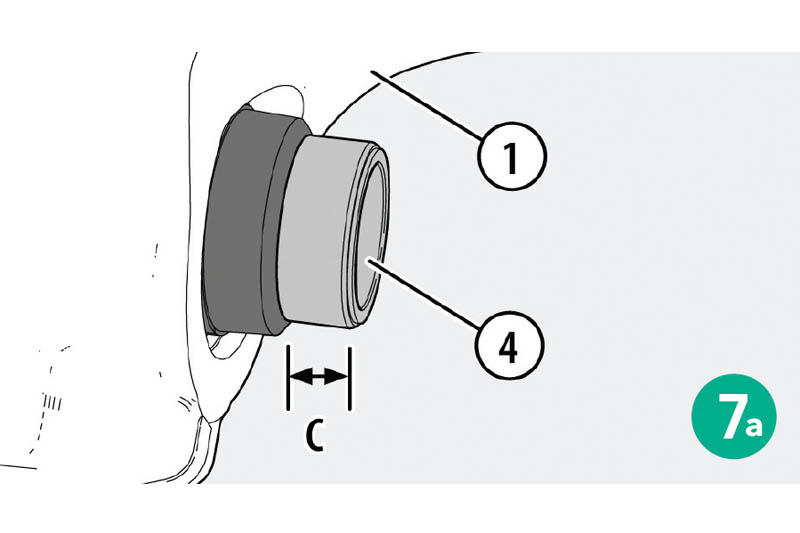
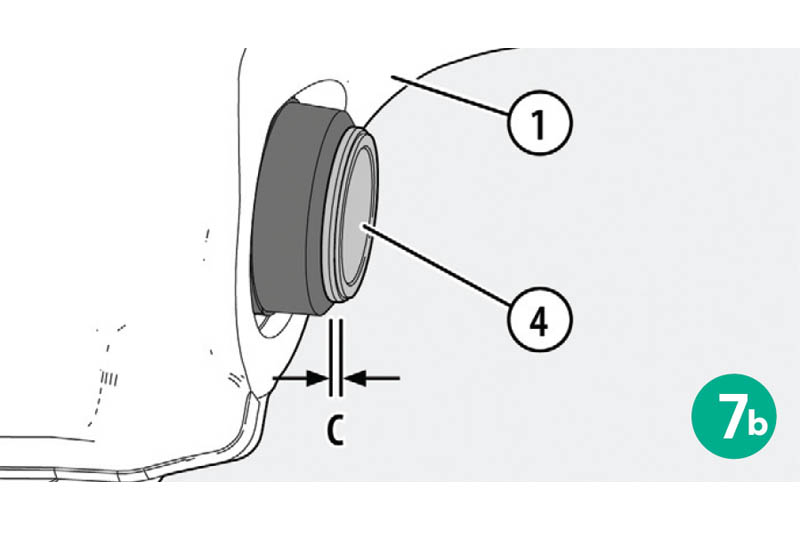
Fig. 7 – If dimension C is less than 1mm, the brake pad thickness and brake disc must be checked with the wheel removed. Depending on operating conditions, it may be necessary to check brake pad thickness and brake disc even when dimension C is greater than 1mm. If any minimal tolerance limits have been reached with the pads, they must be changed as an axle set.
Safety first
- Before starting service work, ensure the service brake and parking brake are not applied and that the vehicle cannot roll away
- Screw threads and tapped holes must be free of lubrication and residuals of thread locking products
- After any service work, check the brake function and performance and the system behaviour on a roller dynamometer
- Bear in mind that a lower performance can appear during the breaking-in phase of the brake pads and/or the brake disc
- Follow service manual instructions and adhere to the wear limits of the pads and the discs
- Use only recommended tools
- Tighten bolts and nuts to the prescribed torque values