SMART Repair brings many advantages to vehicle repair businesses, as Henkel explains.
Henkel, a leader in the development of adhesive, sealant and functional coating technologies, says its
TEROSON Plastic Repair Kit contains everything repairers need to combat the demands made on bodyshops and garages and improve the result of the repair carried out and the time taken to do it.
Included within the kit is: adhesive, plastic repair mesh, spatula, static mixers, application hand gun, primer and a precleaner are all provided for fast and efficient repairs.
Originally developed for the OEM sector, these products are now also available to the aftermarket and qualified repairers can achieve an OEM finish to give their work an important competitive edge.
Pre-treatment
Cleaning
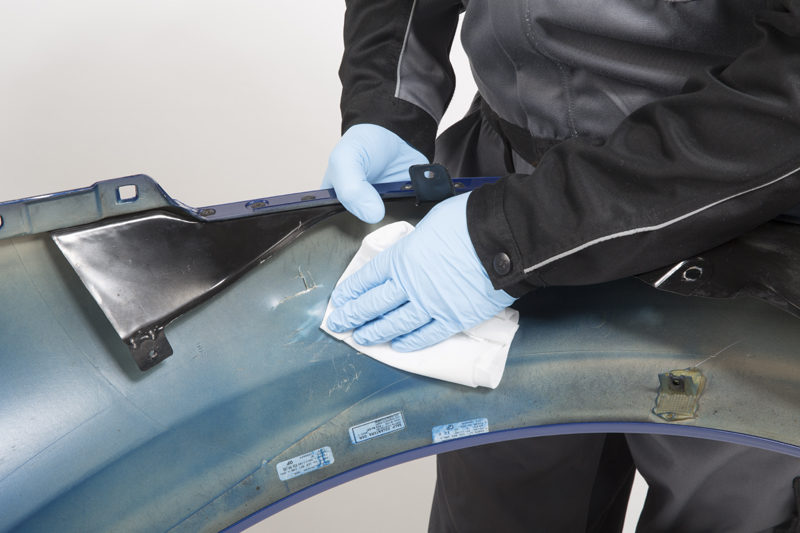
Use high-pressure cleaner to remove major dirt. Rinse the plastic part with plenty of clear water and allow it to dry. Thoroughly clean with TEROSON VR20 and allow five minutes for the solvent to evaporate.
Chamfering
a) Holes
Use a belt sander to grind a V-groove into the front-side edges of the repair area. Henkel says that best results are achieved with 80grit. The hole should also be V-tapered with a grinder.
b) Cracks
Drill out a hole at the ends of the crack. The diameter of the hole should be about 6mm to stop further cracking. Enlarge the crack to minimum 2-3mm gap.
Sanding
Roughen surfaces on both sides, best results are achieved with 150grit, and remove the grinding dust. Don’t forget: The back is just as important as the front!
Cleaning II
Clean the work area, again on both sides, using TEROSON VR20. Make sure to allow a sufficient flash-off time of five minutes for solvent evaporation.
Repair
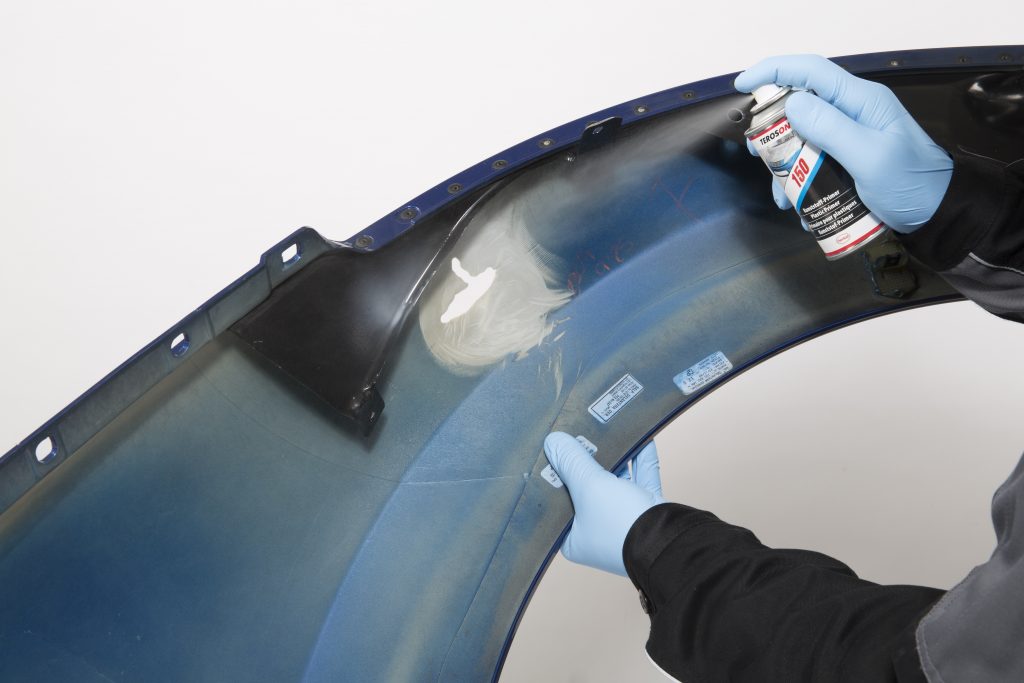
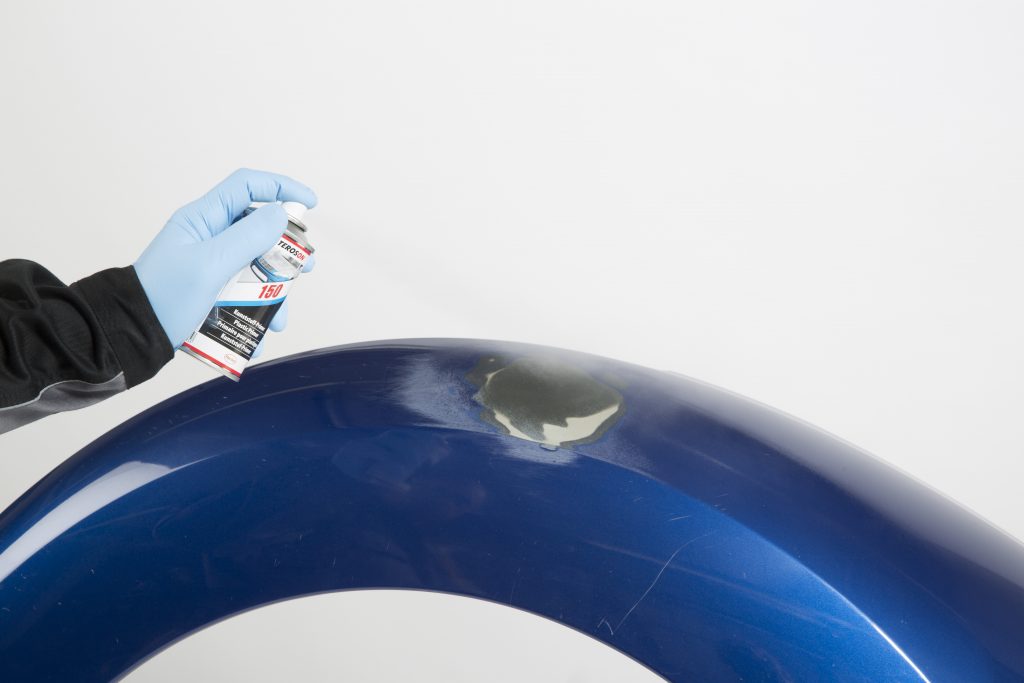
Apply primer
Spray a thin coat of TEROSON 150 Primer onto both sides. Flash-off time is about 10 minutes at room temperature.
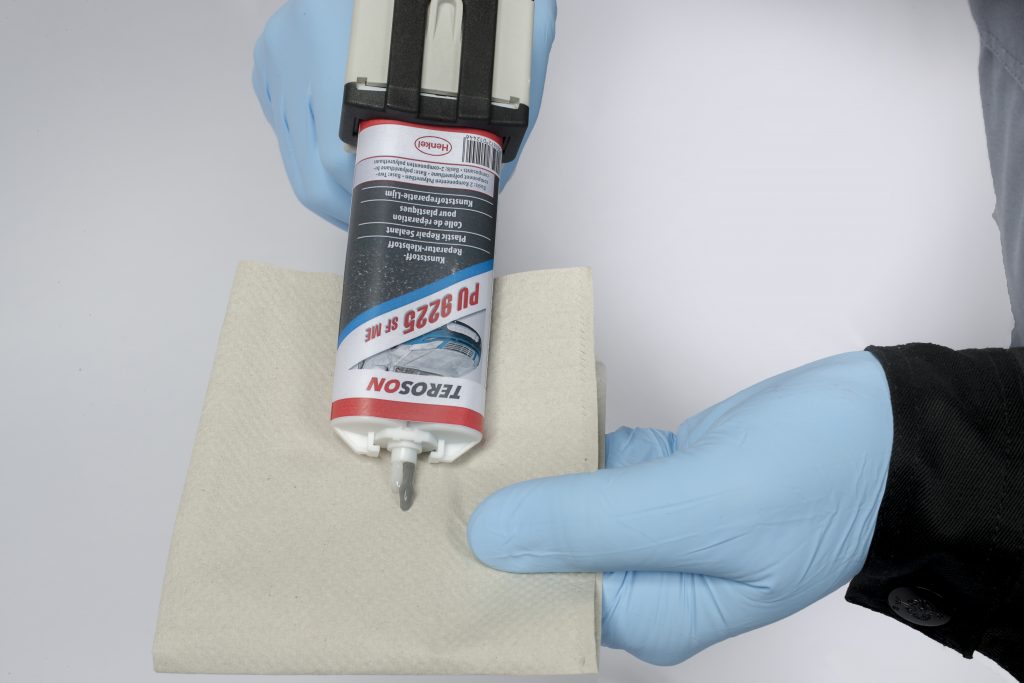
Prepare the cartridge
Remove the cap of TEROSON PU 9225. Before attaching the static mixer to the cartridge, squeeze out a small amount of the material until both adhesive components run equally. This is necessary to achieve a good mix ratio. Attach the static mixer and insert the cartridge into the application gun. Cut off the nozzle tip (static mixer) to enlarge the opening.
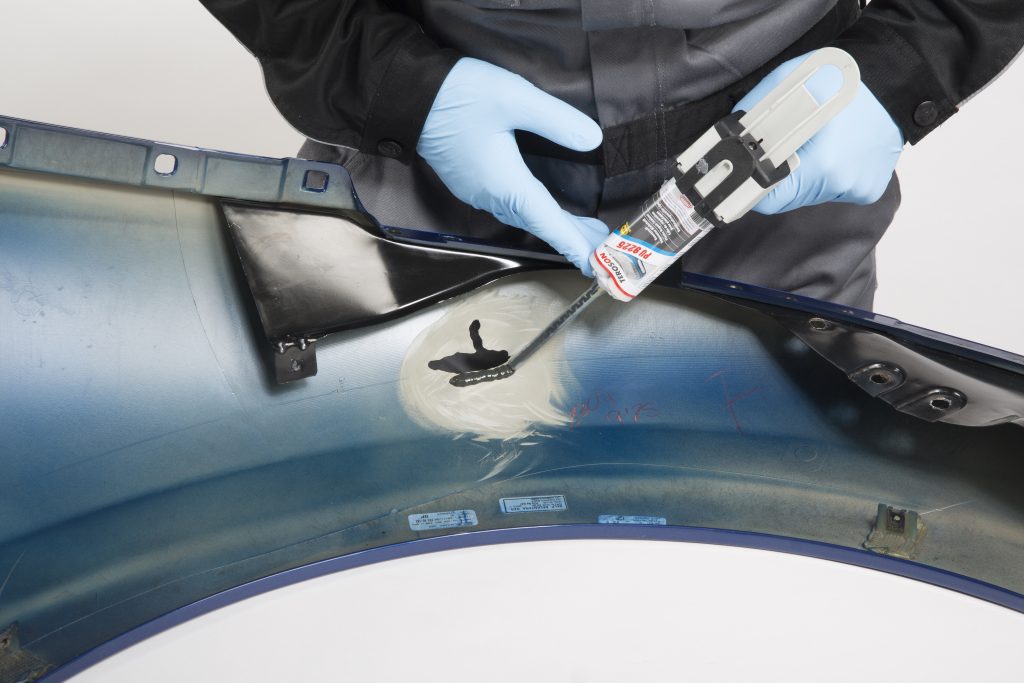
Reverse side
Cut a piece of fibre mesh (minimum 1cm larger than the damage) and apply TEROSON PU 9225 to the back of the repair area. Position the fibre mesh over the damaged area and press it down into the adhesive until the mesh is saturated.
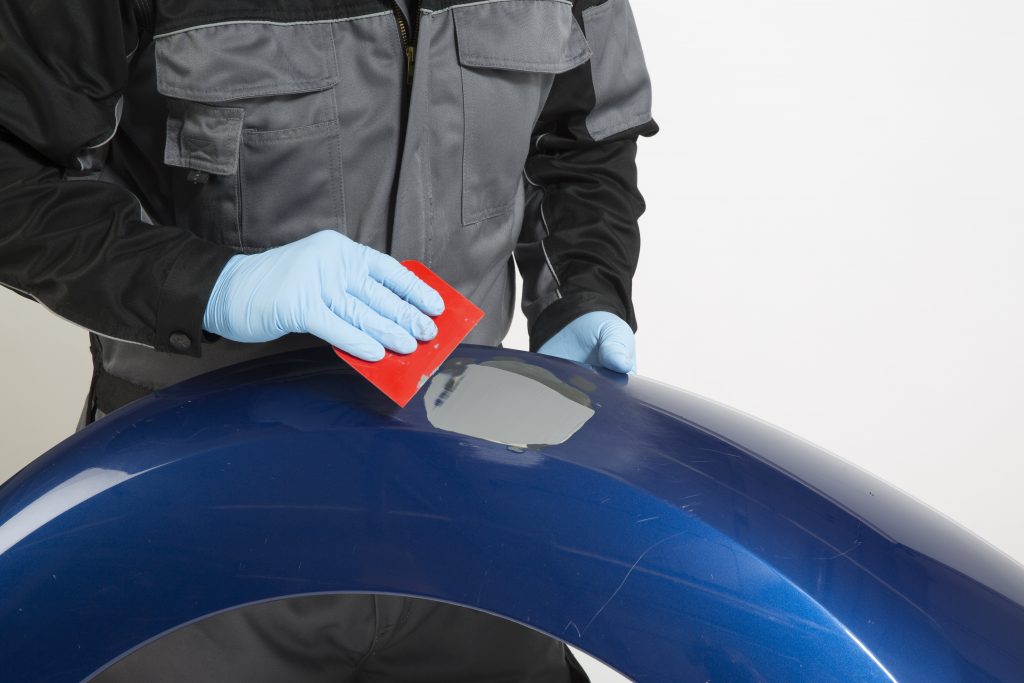
Apply adhesive on top of the mesh and spread it using a plastic spatula or a brush to cover the repair area completely.
Curing reverse side
Cure TEROSON PU 9225 for 15 minutes using an infrared heater or drying oven at about 60°C to 70°C. Allow it to cool down to room temperature before continuing on the front.
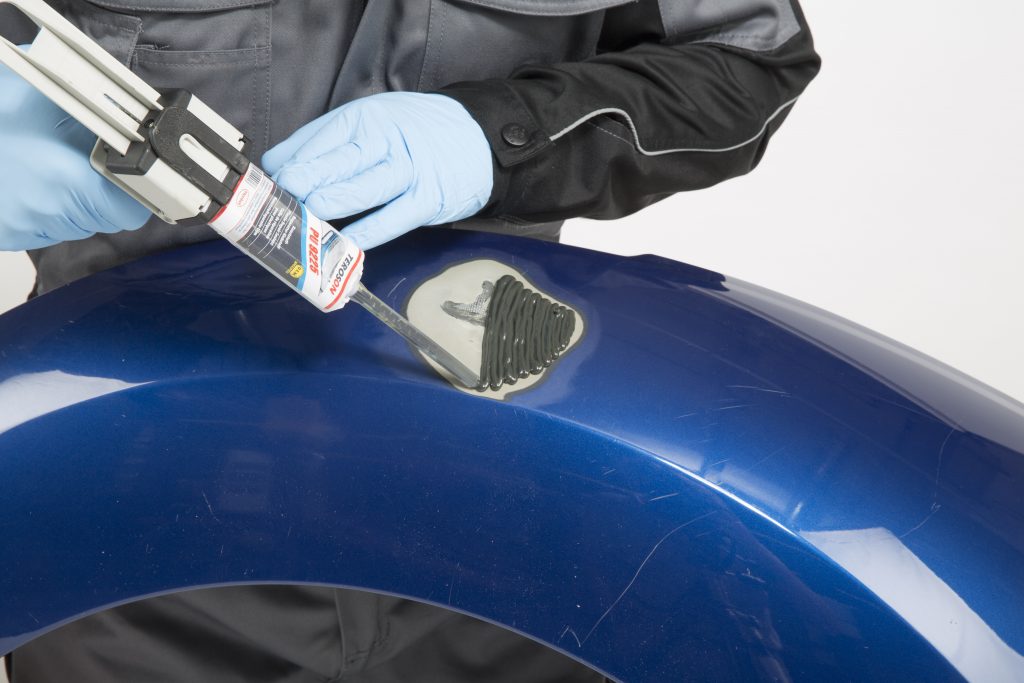
Front side
Apply TEROSON PU 9225 to the front side. Make sure that the nozzle tip is always submerged in the adhesive, to avoid trapped air bubbles. Smooth it down with a spatula, always from the centre of the
damage outwards.
Curing front side
Cure the adhesive on the front side for about 15 minutes using an infrared heater at 60°C to 70°C and allow the area to cool down to room temperature.
Sanding
Sand the area to remove excess adhesive on the front side and restore the original shape of the plastic part. Start with P150 grit paper and progressively use finer sandpaper grits (to P360).
Finish
Pre-treat the work area, again on both sides, using TEROSON VR 20. For optimal adhesion on all different types of plastic Henkel recommends applying a thin coat of TEROSON 150 P PRIMER to the repair area. Allow about 10 minutes flash-off and then Apply PLASTIC PADDING FILLER. Abrade cured Plastic Filler with P240- P400 and follow the refinish manuals of the approved paint manufacture producer.