Juratek offers a useful troubleshooting guide to the inspection of steering and suspension joints.
Ball joints produce constant metal-to-metal contact and are often subjected to extreme conditions of shock and heavy loads, as well as exposure to dust, dirt and moisture. This environment can cause severe corrosion of both the metal and rubber components, and therefore, regular inspection is recommended to avoid serious safety issues.
The following information is designed to assist in the inspection of steering and suspension joints, which are crucial to road safety. These are guidelines only and are not intended to replace the recommended testing routines.
Initial setup
The vehicle should be loaded ready for driving and the wheels should not be elevated.
Preparation
The joint should be free of road dirt and grease. Clean the joint using a dry cloth, removing dirt from the sealing bellows and connection parts.

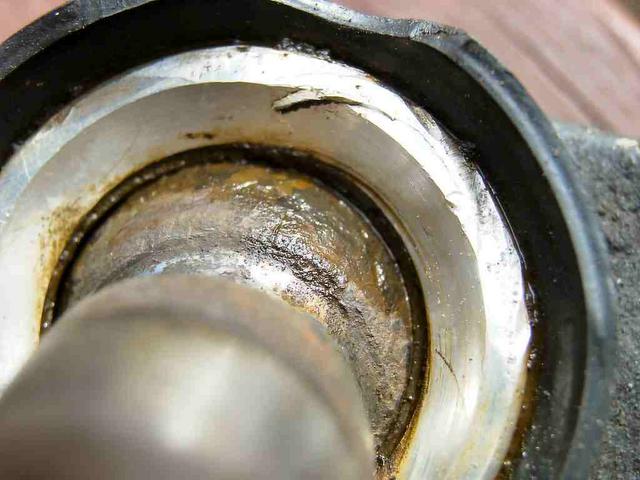
Visual corrosion inspection
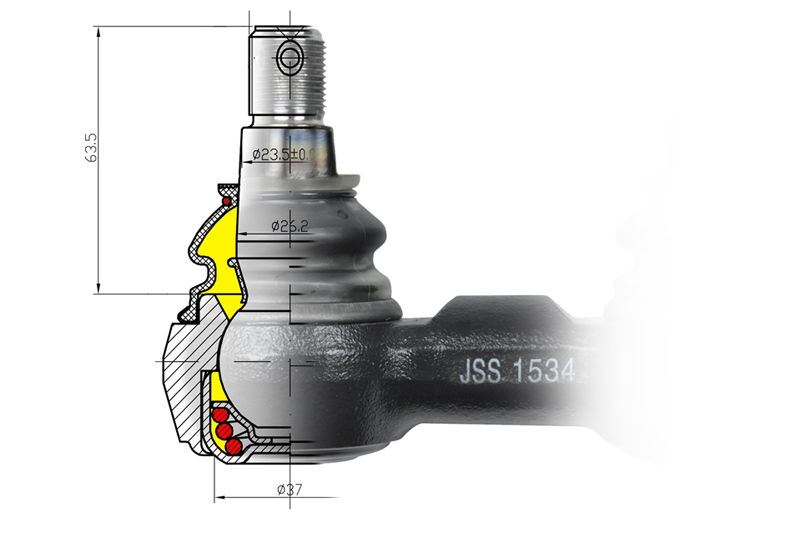
The shaft housing must not show any signs of deep corrosion (the depth of any rust present should be no more than 1mm). Particular attention must be given to the rubber seal cover and the ring seal, where there must be no significant signs of corrosion or disintegration at all. If corrosion is severe the joint must be replaced. If the corrosion is not severe, then the joint does not need to be replaced but the contact areas must be cleaned.
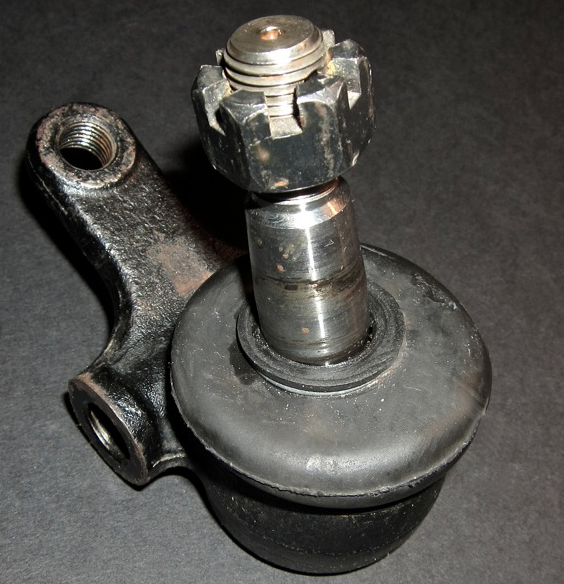
Rubber seal cover
If no obvious signs of damage appear, squeeze the rubber cover by hand to ensure no grease is expelled from the walls – the rubber could be cracked and may only be evident when squeezed. There must be no damage such as chafe marks, tears or holes in the cover.
Also, inspect the seal around the cone for signs of leakage. Damage to the rubber or the seal may cause water to penetrate into the joint, thus causing internal corrosion. If damage is found, the ball joint must be replaced.
Ring seal
The ring seal presses the rubber seal cover against the joint housing. The ring must lie concentrically in the level of the counter groove. It must be possible to turn the rubber cover by hand (do not use tools, as this can damage the rubber). To turn, hold the rubber cover and attempt to turn. This may take a measure of force. If the rubber does not turn, the ring may be displaced and could result in the rubber cover detaching from the joint housing.
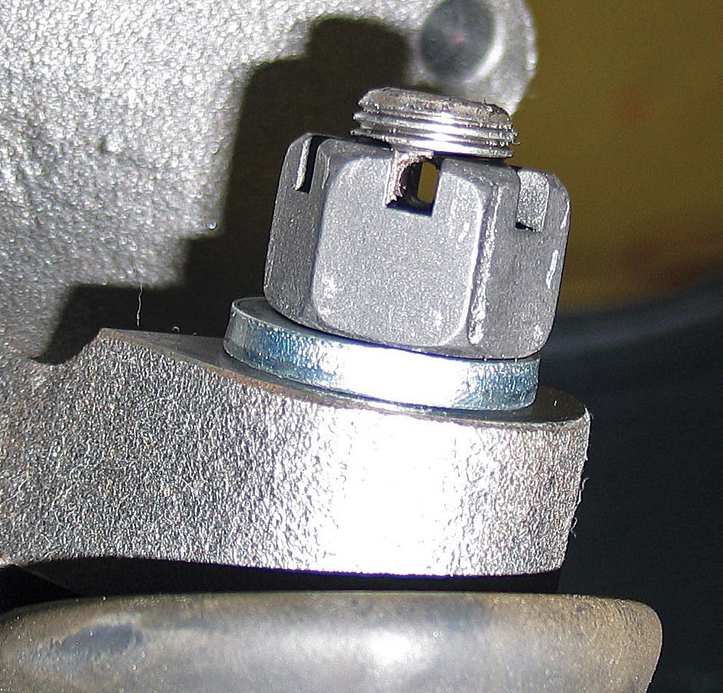
Fixing nuts and cotter pins
The self locking nut or castellated nut must be properly in place and must only be used once. The screw connection which fastens the housing must be checked to make sure it is firmly in place
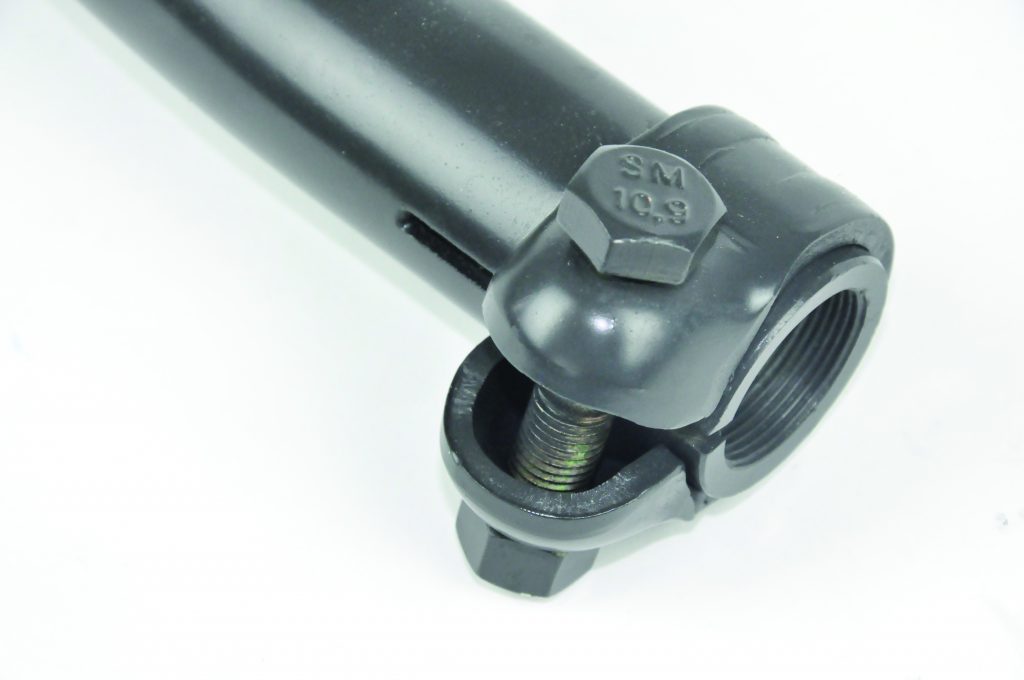
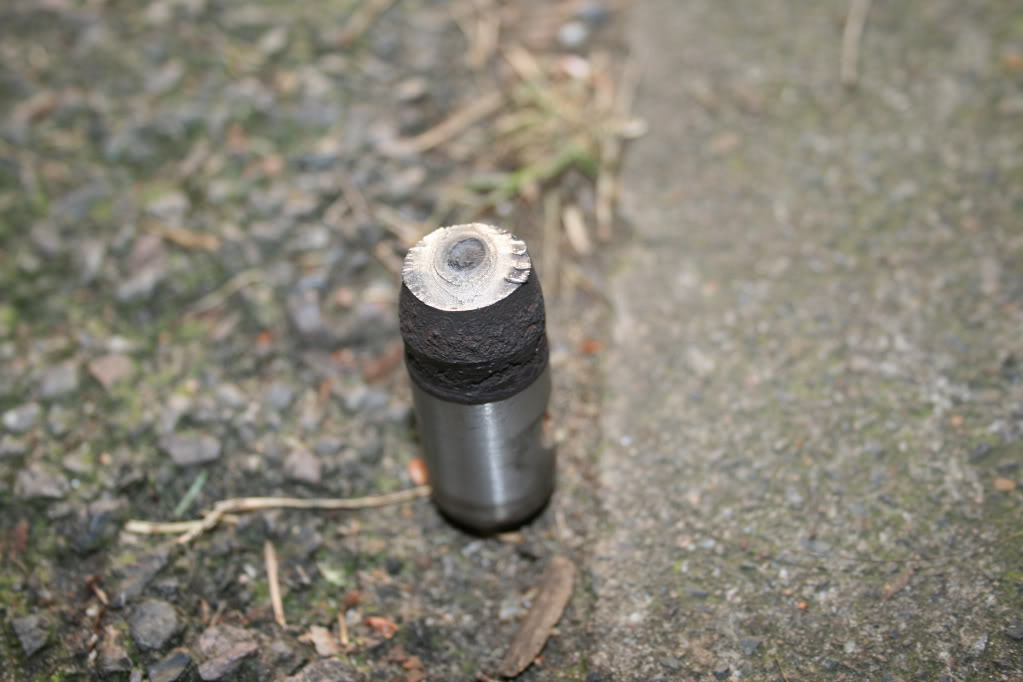
Inspection of shaft connection
The clamping screw must be properly fitted. The nut must rest firmly on the clamp and the screw must not be visibly bent. There must be no signs of significant corrosion on either the shaft, clamp or screw connector. If corrosion exists it should be no more than 1mm in depth. If the clamp is not firmly fixed to the shaft, it could be a defect with the thread on the screw connector. If any of these conditions exist, the joint must be replaced.
Damage
Check all areas of the joint, including the shaft and housing for damage. Damage can be caused by foreign objects, impact or poor installation. If any damage is found, the component must be replaced.

Check the shaft for signs of severe corrosion or cracks, as a broken shaft can cause serious safety issues.