ZF talks to CVW about braking system legislation and provides a step-by-step guide to changing a brake disc.
ZF Aftermarket says it is a firm advocate of any regulation which improves the safety of global road users. In line with this, the business formed part of a working group which resulted in legislation stating that from November 2014 all heavy commercial vehicle brake discs and drums manufactured and sold across Europe had to meet the minimum standards outlined in the ECE R90 legislation. In 2016, this was extended to include light commercial vehicles.
James O’Gara, European HCV Channel Marketing Manager, ZF Aftermarket, explains: “We are committed to improving road safety and welcomed this legislation. Now, we need to ensure that these rules are universally enforced and policed industrywide. If we work together to do this, these regulations will make it much harder for sub-standard and counterfeit product to reach the market and seriously compromise driver safety.”
Back to basics
In order to meet these standards, the parts must pass a series of tests and perform to levels similar to the OE part. In line with this, ZF Aftermarket enforces high quality testing processes across its serial production – where possible, employing first-hand process control instead of relying on third party testing facilities.
In 2016, ZF Aftermarket completed its TRW Proequip HCV braking program by adding the complete Air Disc Brake System (ECE R90-homologated brake discs, and remanufactured air brake calipers) to complement the bake pad program.
James added: “The ideology of the full and complete ‘package’ extends far beyond our product offering. Our digital developments mean our customers now have greater and more convenient access to our parts than ever before, with advances such as the ZF part finder App and improved integrated on-line catalogue. In addition, Tech Corner, the TRW brand’s free on-line technical information portal allows us to share our wealth of technical knowledge with our customers to future proof their own businesses.”
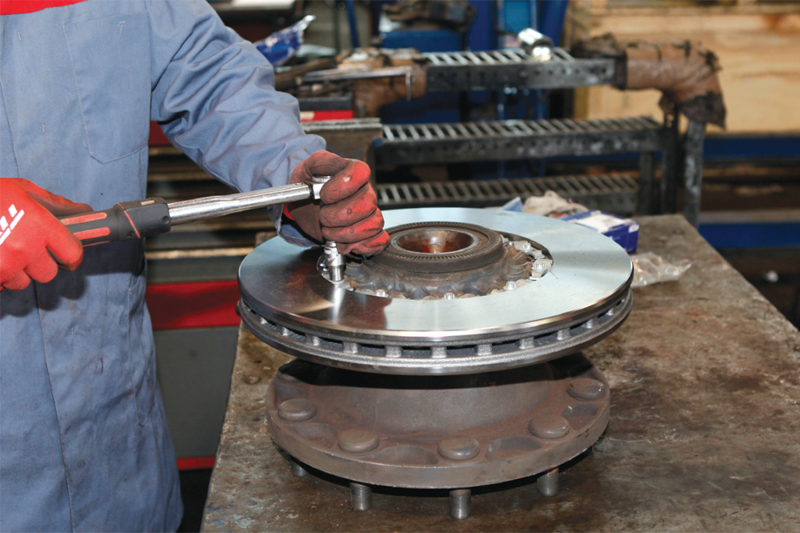
Replacing the brake disc on an HCV
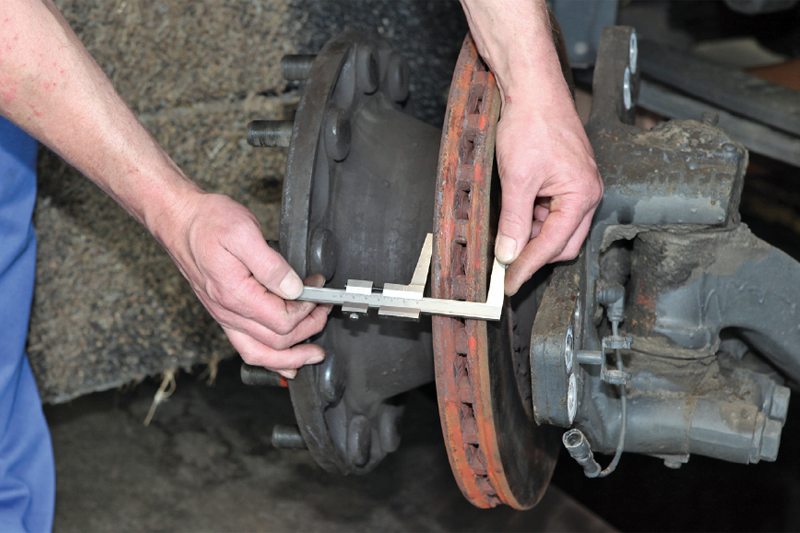
Before you carry out a repair, it is particularly important to closely observe the guidelines, installation regulations and repair instructions of the specific vehicle manufacturer. Before removing the part, compare the new brake disc with the fitted disc. Aside from the correct part number and design, it is important to ensure that you have available all accessories required to connect the wheel hub and brake disc, e.g. new bolts, wedges and lubricants, as well as the special tool required.
After safely lifting the vehicle and removing the wheel, you can start changing the brake disc. After disconnecting the cable connections of the ABS sensor and pad wear indicator, and removing the brake cylinder, the brake caliper pistons have to be reset mechanically. To do this, remove the adjuster sealing cap and turn the adapter underneath it (included as an accessory with TRW brake pads) anti-clockwise. The pistons then reveal the inner pad. The “breakaway torque” of the overload clutch in the adjuster produces a “click” sound.
Now you can remove the spring pin, the safety bolt and the pad retainer, together with the brake pads. Once the carrier’s attachment bolts have been removed, the caliper can then be completely removed. Removing the wheel hub with the brake disc.
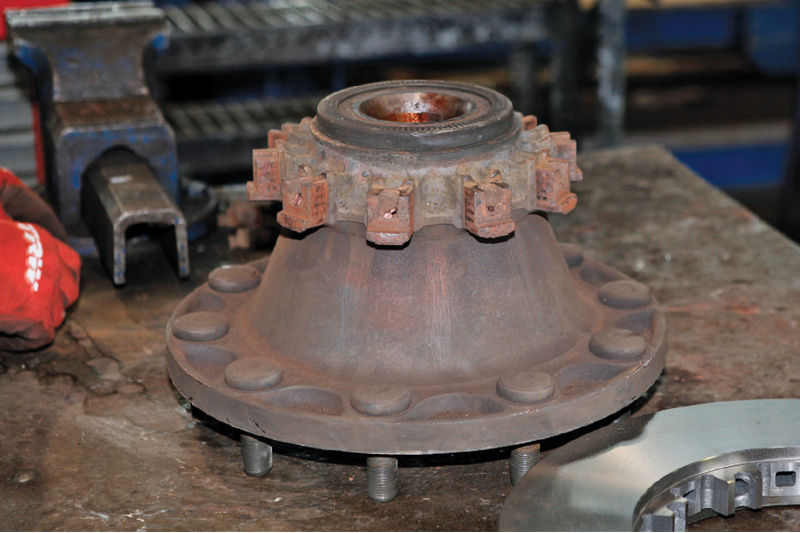
To remove the wheel hub and the brake disc connected to it, first remove the axle nut cap and the axle nut itself. Then remove the wheel hub and disc and place them on a stable work surface. Now the ABS ring can be removed. Loosen and take out all connecting bolts between the wheel hub and the disc. The brake disc can then be pressed away from the wheel hub on a hydraulic press.
Prior to fitment, the contact surfaces on the wheel hub must be cleaned thoroughly, and should be free of any corrosion. Fit and secure the brake disc to the wheel hub using a new set of connecting bolts. First screw the bolts in by hand and then tighten them in a diagonal pattern to the specified torque.
Then fit a new ABS ring on the wheel hub. Now the wheel hub can be remounted on the axle and secured with the axle nut. Tighten the axle nut to the specified torque and refit the axle nut cap. Before remounting the brake caliper, clean the brake disc. The next step is to insert the new brake pads into the brake caliper and fit the pad retaining springs provided.
Due to ongoing product improvement measures, TRW has changed the design of the pad retaining spring on some pad kits. The new pad retaining spring and the previous TRW or OE pad retaining spring are completely interchangeable.
Now fit the accessories supplied to secure the pads, and the wear indicator. TRW advises never to rework the brake pads. Manual reworking of the pads, such as grinding or filing the reverse side of the pad, causes mechanical and thermal overload. This can create unwanted noise or cause the brake caliper guides to stick. It reduces the efficiency of the brake and increases wear and noise. Do not make any changes to the brake system. Now you can mount the brake cylinder and connect the cables.
The final adjustment work is particularly important for the function of the brake later on. Carry out the adjustment process specified by the manufacturer:
- Turn the adjuster clockwise until the pads touch the brake disc, but not too far!
- Then turn the adjuster back by three to four clicks.
After actuating and releasing the brake, it must be possible to turn the wheel hub by hand. Then mount the wheel, centre it and secure it to the torque specified by the vehicle manufacturer.
After a test drive, check the brake system.