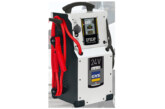
Bowmonk explains why its portable BrakeCheck solution is a viable alternative to roller brake testers when carrying out a non-MOT brake test.
Regular brake tests are currently being requested by the DVSA on all commercial vehicles of 7.5 tonne and over, as part of an interim safety inspection. At the absolute minimum, the agency is asking for a quarterly voluntary brake test to be carried out in addition to the annual MOT test.
Fortunately, most commercial operators have taken heed of this request and are having their brakes checked more frequently, as it is a means of monitoring braking efficiency more closely. However, in some cases, it would appear that this frequency of testing is still not enough, as the level of deterioration is a cause for concern.
In most cases, the DVSA would prefer this test to be carried out as part of the six-weekly inspection. This would have thebenefit of highlighting a decrease in braking performance considerably sooner than those performed once every three months, and in doing so, afford more effective preventative maintenance opportunities.
Evidently, there are a great number of commercial workshops who are still of the misconception that all of the aforementioned brake tests have to be performed on a roller brake tester. This is not the case! The Traffic Commission has allowed the use of a DVSA-approved brake tester, like Bowmonk’s BrakeCheck, for all non-MOT brake tests.
Aside from the mandatory requirements, there is also the upsell opportunity. Workshops providing a brake overhaul service, where components are in need of replacement, can offer a ‘before and after’ brake test report; an opportunity to show their customers the level of efficiency achieved prior to and following any necessary repair work.
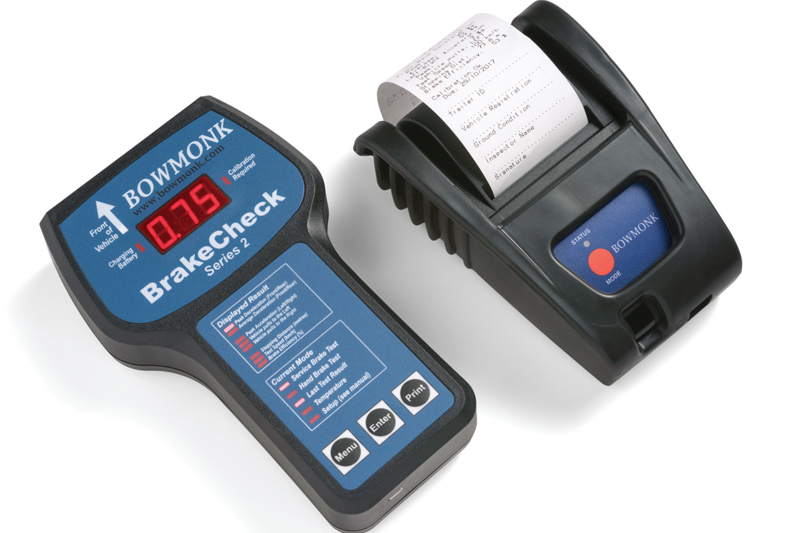
A user guide to BrakeCheck
- Position the BrakeCheck unit on a level surface, such as the passenger side foot well. Switch the unit on by pressing and holding the ‘Menu’ button until ‘Sbr’ appears in the display.
- Confirm Service Brake choice by pressing ‘Enter’.
- When the unit is level enough to start the test, a symbol (pictured left) will be shown on the display. Once the symbol is displayed, press ‘Enter’.
- The unit is now ready for the test. When the test area is clear, accelerate the vehicle to an appropriate test speed (e.g. 20 mph).
- Once the vehicle is travelling at an appropriate test speed, check for traffic approaching from behind. If safe to do so, apply the footbrake as a controlled emergency stop, without skidding.
- Once the vehicle has been brought to a complete stop, the unit will generate and display a braking efficiency value.
- Once the Service Brake test is complete, change to Hand Brake mode by pressing the ‘Menu’ button (so that the hand brake test LED is illuminated). As before, confirm this choice by pressing ‘Enter’, which will take you to the levelling display. Press ‘Enter’ when the level indicator is shown.
- As before, accelerate the vehicle to the test speed, this time applying the hand brake to stop the vehicle. Note: please check with your vehicle manufacturer if this type of procedure is acceptable.
- Once the vehicle has come to a complete stop, the display will show the braking efficiency of the hand brake.
- To view the service brake test report, press the ‘Menu’ button until the last test result and service brake test LEDs are illuminated. Then press ‘Enter’ to display the result, which can now be printed using the optional wireless printer.
- With the BrakeCheck unit positioned approximately 2 to 3cm in front of the infra-red printer, switch on the printer and press the ‘Print’ button on the BrakeCheck to print the test result.
- To view or print the hand brake test, carry out the same procedure, but use the ‘Menu’ button to illuminate the hand brake test and last test result LEDs.