Wheel alignment specialist Pro-Align outlines how workshops can quickly perform a multi-axle wheel alignment check with the Hunter WAHD, step by step.
There are several benefits that regular wheel alignment checks can have on commercial vehicles, including reduced fuel consumption, tyre wear, emissions and even driver fatigue.
Traditionally, wheel alignment servicing has been seen as a time-consuming process especially when it comes to multi-axle vehicles such as HGVs, making it an operation that is often overlooked by many operators and a challenging service for workshops to sell.
However, workshops equipped with the WAHD alignment system from workshop equipment manufacturer, Hunter, can carry out fast and accurate wheel alignment diagnostics for multi-axle trucks in only four minutes. This means it’s now quicker than ever to save money on fuel and tyre costs or highlight a paying work opportunity to customers.
A standard wheel alignment procedure typically requires technicians to carry out 17 different operations which can take around 15 minutes in order to generate the alignment reading. With the Hunter system, the much simpler and slicker process requires only seven steps, which are all completed in just four minutes.
Step 1 : Position the vehicle
In preparation for the wheel alignment check, the tractor unit needs to be positioned just behind the system’s turnplates with the steering wheel set straight ahead. Turn off the engine, not forgetting to leave the brakes off, in preparation for the rolling compensation check.
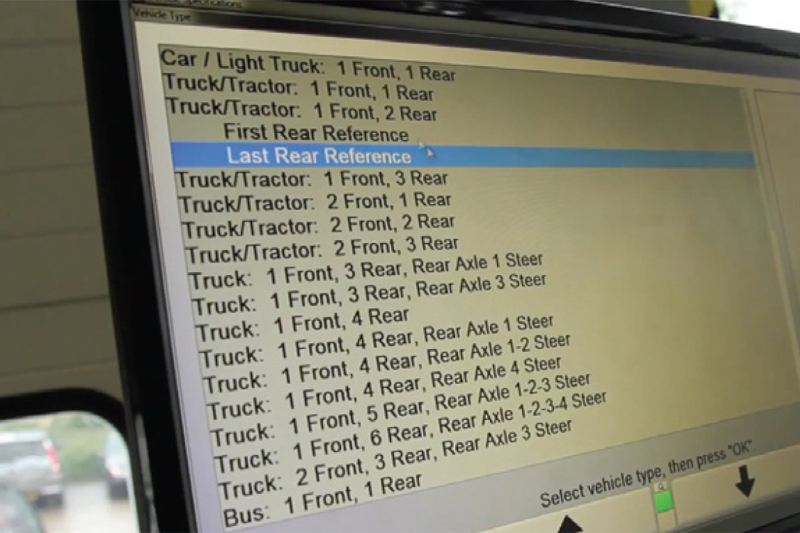
Step 2 : Select your vehicle
From the alignment console, create a work order and recall the correct vehicle specification from the comprehensive list available.
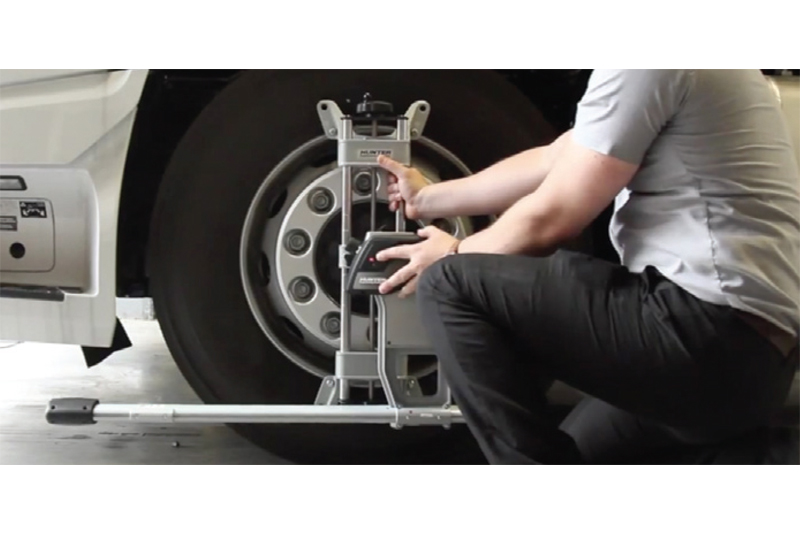
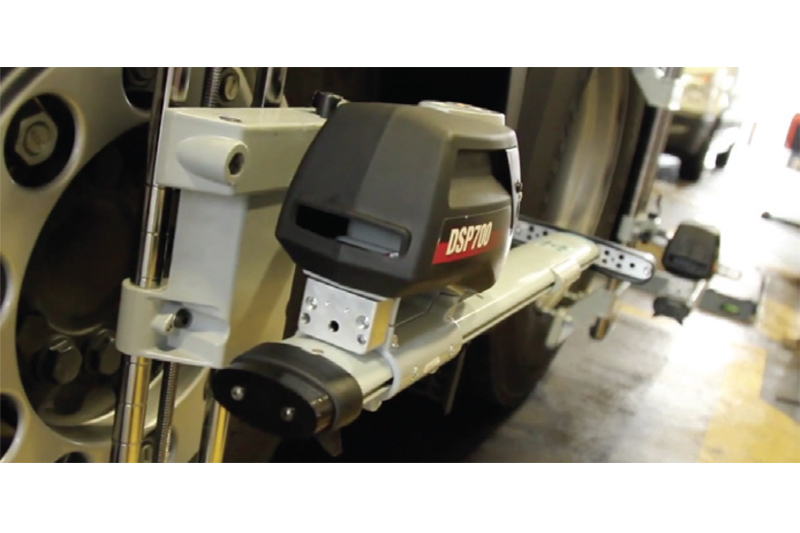 Step 3 : Mount the sensors
Remove the wheel clamps (with the alignment sensors mounted) from their charging station and fit them to each of the wheels. As you fit each of the clamps and alignment sensors, make sure they are all unlocked, so they freely hang horizontally and are switched on ready to communicate wirelessly with the alignment console.
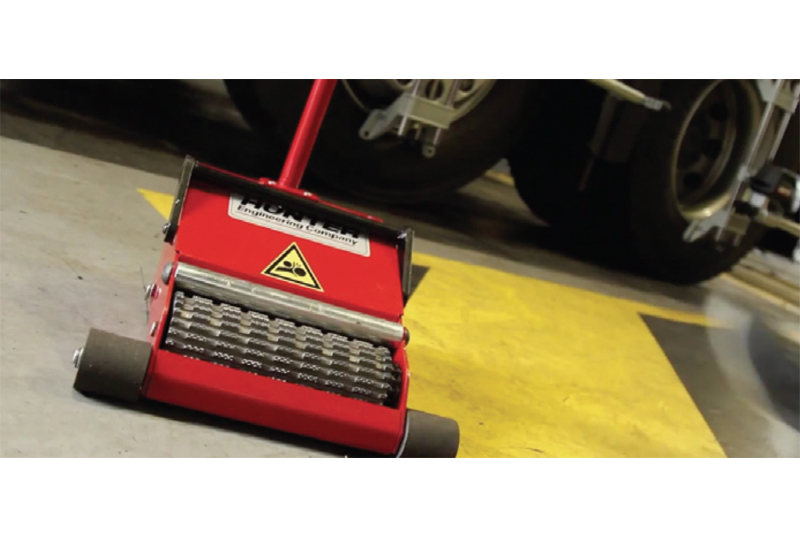
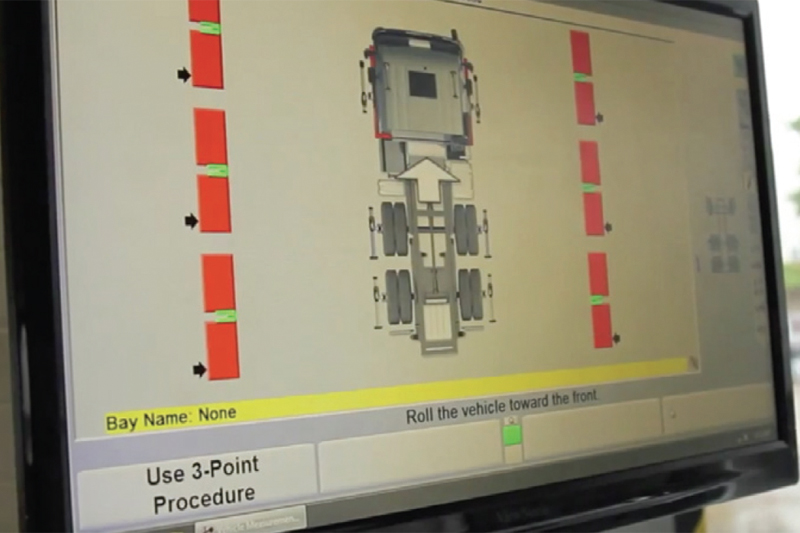
Step 4 : Roll forward to compensate
Place the Hunter Truck Pusher behind one of the vehicle’s wheels where you can still see the alignment console screen. Then, simply set the pusher into action and continue moving the vehicle forward until the indicators on the alignment console screen turn green. The front wheels should now be directly on top of the turnplates. Stop and wait for the readings to load. This completes the compensation check including toe, camber and scrub angle. The alignment measurement figures are now displayed on the screen.
Step 5 : Steer caster
If your vehicle requires a caster measurement the Hunter system will automatically prompt you to carry this out. Move into the cab and follow the alignment console screen instructions, turning the steering wheel from left to right as indicated, before returning it to the straight-ahead position.
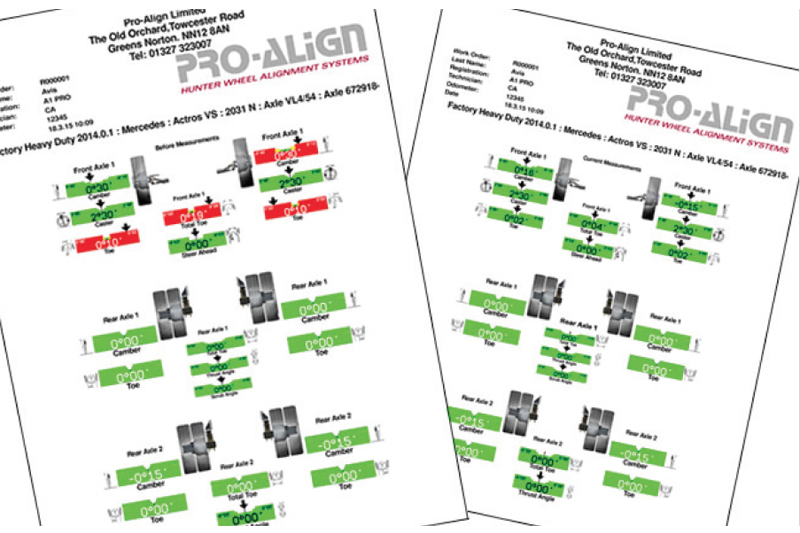
Step 6 : Print the results
Simply print out the alignment results which clearly indicate where any of the alignment readings are outside of the vehicle manufacturer’s recommended tolerances.
Step 7 : Sell the service
That’s it, in just four minutes you have a clear printout of the results. Where correction is indicated by the measurements in red, your team can now make the necessary corrections ensuring tyre wear is reduced and fuel economy is increased.