Brake manufacturer, DON, has compiled a list of best practice tips, designed to help any CV mechanic with the efficient replacement of brake pads, starting with the popular SB7000 caliper.
Correct equipment
Prior to starting any work, it’s important to ensure the correct safety equipment is in place and that any special instructions by the brake systems manufacturer are followed. No brake pad replacement is going to be dust free, and for that reason it’s key that all precautions are taken.
The highest risk of dust contamination is when the brake pads are being removed and the associated parts are being cleaned in preparation for the new brakes being fitted. Cleaning these products in a chemical wash facility is an effective way to remove most of this, while reducing the possibility of airborne dust.
Before starting work
The first job anyone should undertake is to confirm the vehicle’s wheels are chocked. It’s also vital that the service and parking brake, as well as any other temporary hold brakes, is released. Make sure the supply air pressure of the braking system is >6.5 bar, and where possible connect an external air supply to ensure system pressures are maintained. You can then begin to remove the wheel using the correct tools.
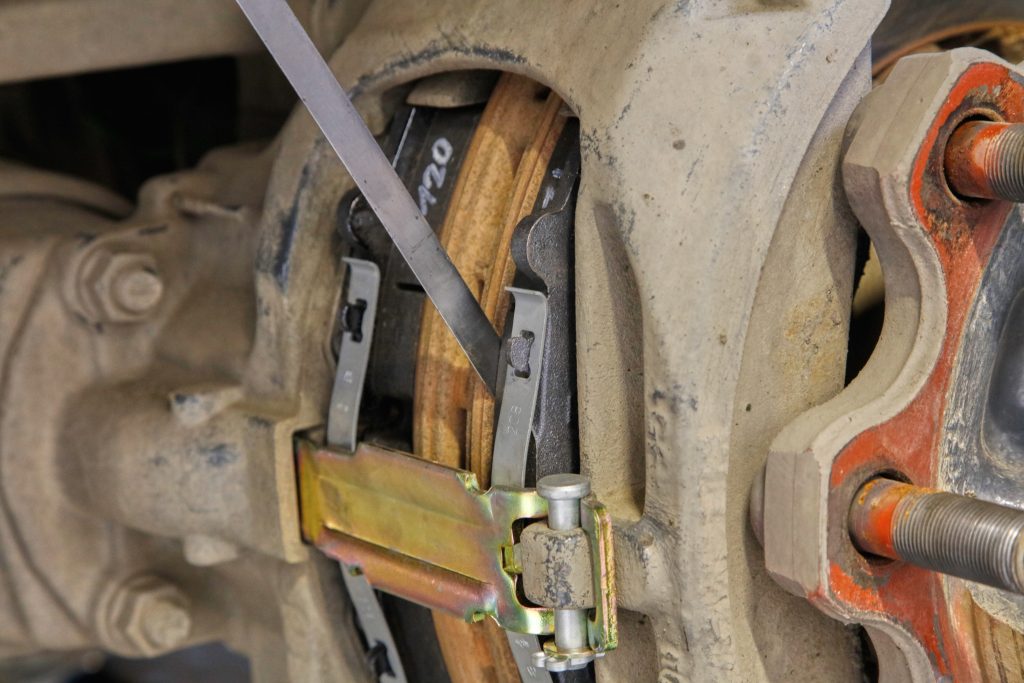
Beginning of pad removal
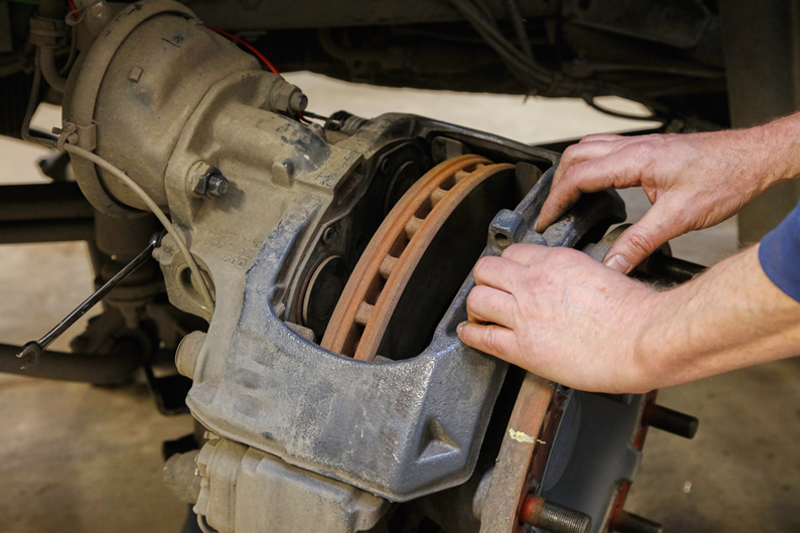
Once the wheel has been removed, the caliper’s position will be in view. The orientation of the caliper will always differ, depending on an axle or vehicle requirements.
To start the process, begin by removing the spring clip and washer, before lowering the pad retainer and detaching the pin. Then, slide out and remove the pad retainer, before disconnecting any wear sensor components as necessary. When removing the retainer, it’s important the pads do not fall out from the caliper.
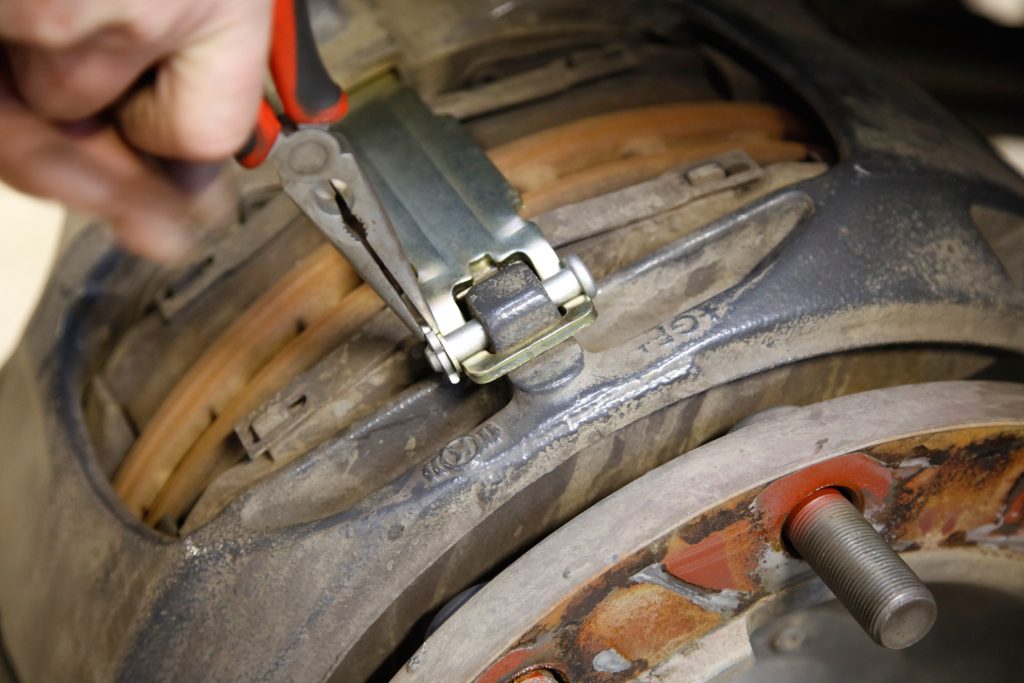
After this has been disconnected, pull the adjuster cap using the tab, whilst ensuring the shear adaptor stays in place. Tools must not be used during the removal of the adjuster cap, as this may cause damage to the sealing elements.
It’s important to note that the shear adaptor is exactly that, and in the event of a problem during readjustment, the adaptor will fail, ensuring the internal caliper components are not damaged. There are spurious non-genuine adaptors available that may not shear, which in turn could potentially cause expensive and unnecessary damage.
You should then fully wind back the tappet and boot assemblies by rotating the adjuster and using the shear adaptor in an anti-clockwise direction. A loud noise should be heard when conducting this procedure. You can then begin to remove the outer brake by sliding the caliper towards you, and then remove the inner brake by sliding the caliper away from you.
Replacing the brake pad
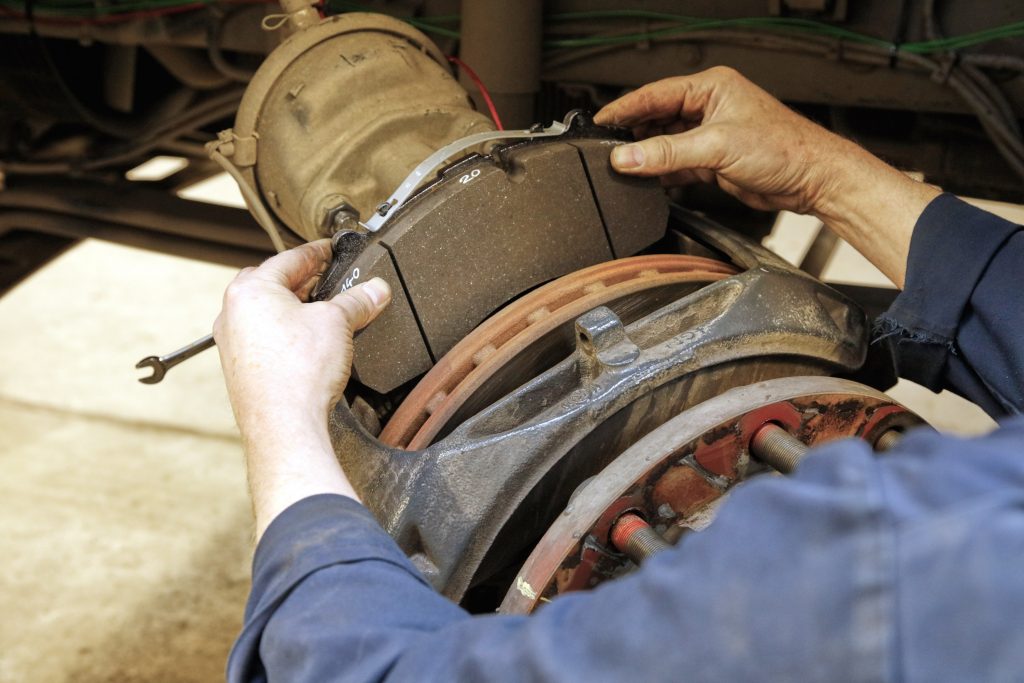
Brake pads should only be replaced in axle sets. Prior to any fitment, the carrier and its pad supports need to be cleaned and examined to ensure the pads fit correctly, both for initial and continual fitment. This can be done using a wire brush, caliper file or blunt scraper, but caution should be taken to ensure no damage to the brake pads during the process.
Depending on the application and duty of the brakes, a suitable lubricant for the carrier abutments and contact areas should be used. At DON, we recommend using Ceratec; it’s vital to avoid any potential contamination of the brake pad surfaces.
When lubricating, ensure the areas on the carrier are clean and free from corrosion, and take care not to use too much lubrication, as this will collect wear debris and road ingress.
Before inserting the freshly lubricated pads, ensure all tappets are fully wound back by rotating the shear adaptor in an anti-clockwise direction. Then, insert the inboard pad by pushing the caliper away from you, and once in position, pull the caliper towards you to place the outboard pad. Once fitted, wind the adjuster with the shear adaptor in a clockwise direction until contact is made with the pads and brake disc, before turning the adjuster in an anti-clockwise motion by three clicks.
Completing the replacement
Once the new pads have been refitted, the running clearance should be checked in compliance with the brake systems manufacturer’s service manual. It is important that this measurement is taken using a feeler gauge and is between 0.6 and 1.2mm, as anything above or below may cause problems. If the clearance is too great, there’s potential risk of brake failure, and if it’s too small, there’s a chance of overheating, which in turn will damage the brakes. If the gap is larger than 1.2mm, the adjuster must be checked by referring to the Knorr service manual. Once the measurements are achieved, the adjuster cap and pad retainer can be refitted, before replacing the spring clip.
Finally, refit the wheels using the correct tools and while still referring to the manufacturer’s recommendations, ensure the required torque settings are adhered to.