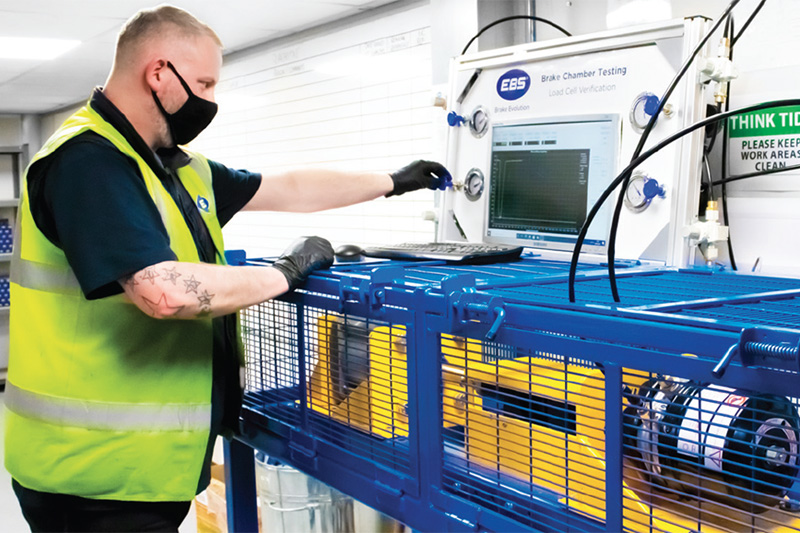
Andrew Blower, UK Sales Manager at air brake specialist EBS, talks to CVW about internal wind-off (IW) mechanism spring brake actuators.
Spring brake chambers are a fundamental part of the wheel end braking system transforming the energy of compressed air into a mechanical movement with such high forces to bring the vehicle to a safe stop, as well as being able to keep the brake in a parked position.
A regular pattern EBS sees is that users do not fully understand the workings within the IW units or how to properly set these during the fitment process along with the do’s and dont’s. A regular ‘don’t’ EBS observes is evidence of air tools being used to set the wind off mechanism, despite the fact that the units clearly state that air tools must not be used when setting these – but they still are.
So that EBS can educate the users of this product type and assist in avoiding further vehicle downtime and costs, EBS engineers have compiled a detailed step-by-step process, along with some useful CAD exploded drawings to help illustrate the internal mechanism process during each stage and what the result will be when these steps aren’t followed.
Full vehicle guidelines and health and safety procedures must be followed when replacing items of this nature and to ensure the vehicle is in a safe and secure manner in order to carry the work out safely. Never attempt to remove the brake chambers body.
Two common issues EBS encounters on a regular basis come down to the fitment process when this style of actuator are being replaced, these being:
- The wind-off bolt mechanism not being turned in the correct manner until the “button” is fully retracted into the wind off bolt end – see Step 4.
- The mechanism being over-torqued (usually from the use of air-tools during fitment) and subsequently causing a breakage of the connection between the piston and spring rendering the unit unfit for use and voiding all warranty – see Step 6.
Step-by-step guide
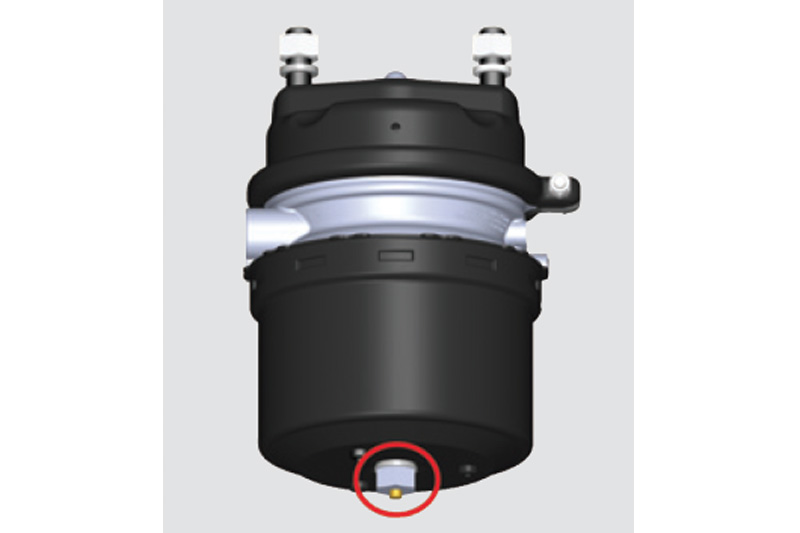
Step 1. EBS supplies all IW brake chambers in a prefitment state known as ‘caged’ with the push button exposed from the wind-off mechanism nut (circled) and these are how they will reach the user.
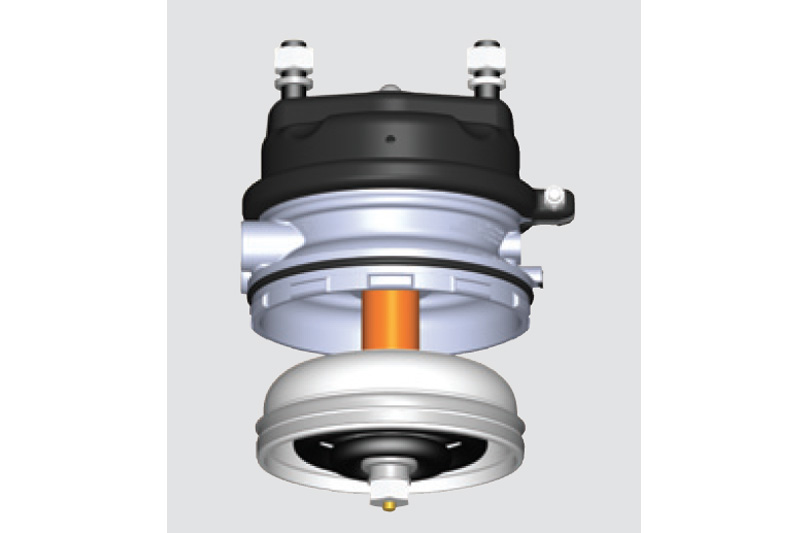
Step 2. In its pre-fitment state, shown with the lower body removed to display the internal workings.
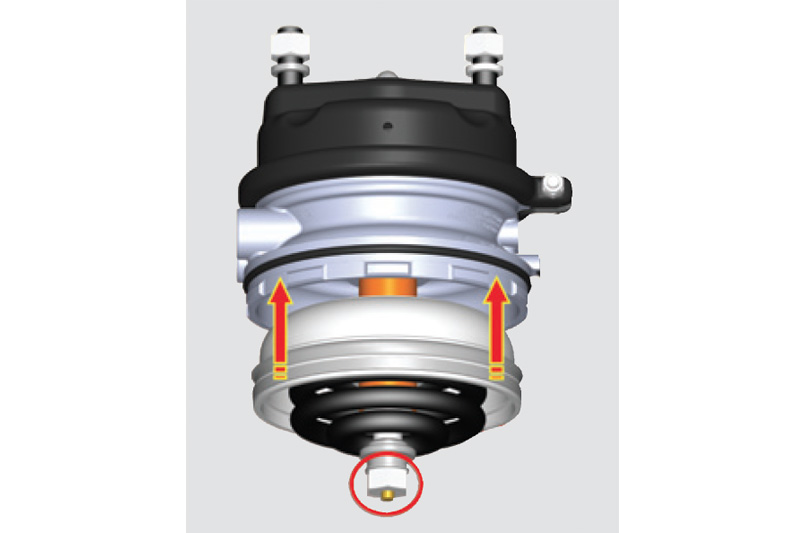
Step 3. During the fitment process the winding mechanism is turned, with air pressure of around 6.5 bar applied to port 12, in the correct direction (as is clearly stated on the instructional label affixed to the units EBS supply) which begins to move the protective plate allowing the spring to actuate the piston. Do not use air tools to perform this.
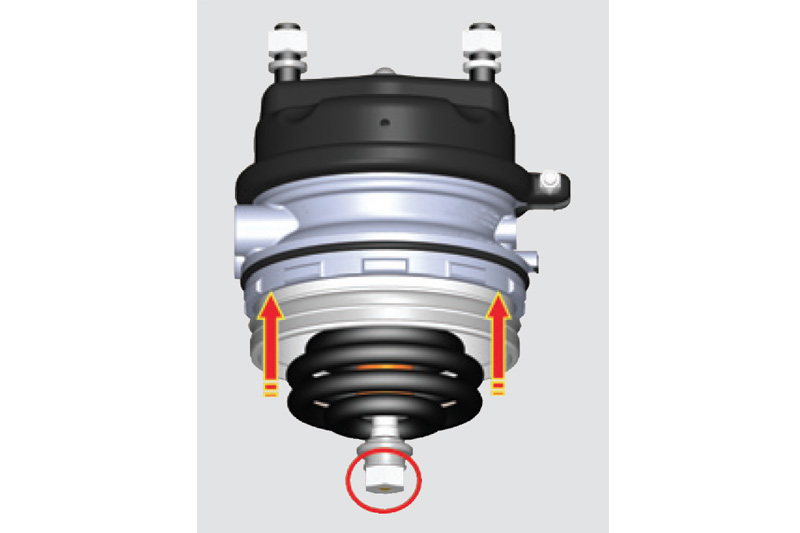
Step 4. When the mechanism has entirely un-caged, the button on the winding mechanisms nut will have fully retracted inside the mechanism itself and is now ready to fit to the vehicle.
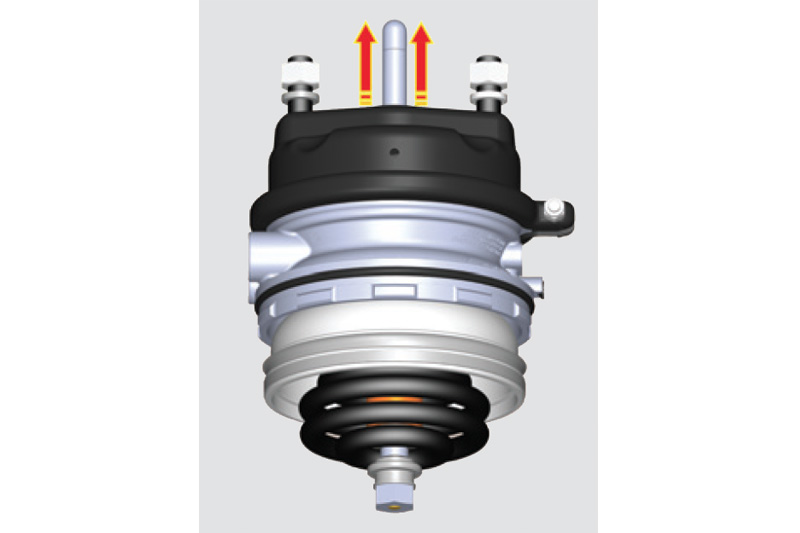
Step 5. Once the chamber is fitted to the vehicle and the handbrake is applied, this will release air from the chamber, and the piston will actuate.
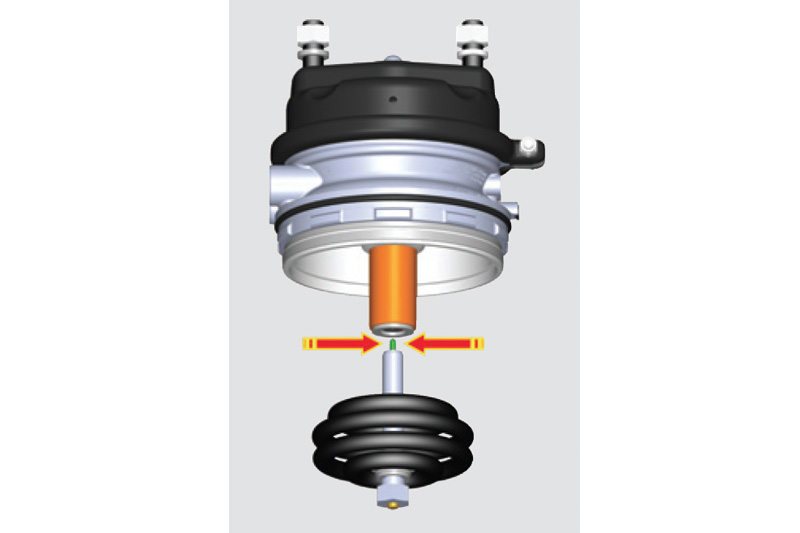
Step 6. A prevalent issue is that the users over-torque the mechanism (usually by the use of air tools during fitment). When this occurs, it causes a breakage of the connection between the piston and the spring. This, of course, damages the unit and renders it unfit for operation as well as voiding any warranty.

